

meta data for this page
Workflow States in Process Maps
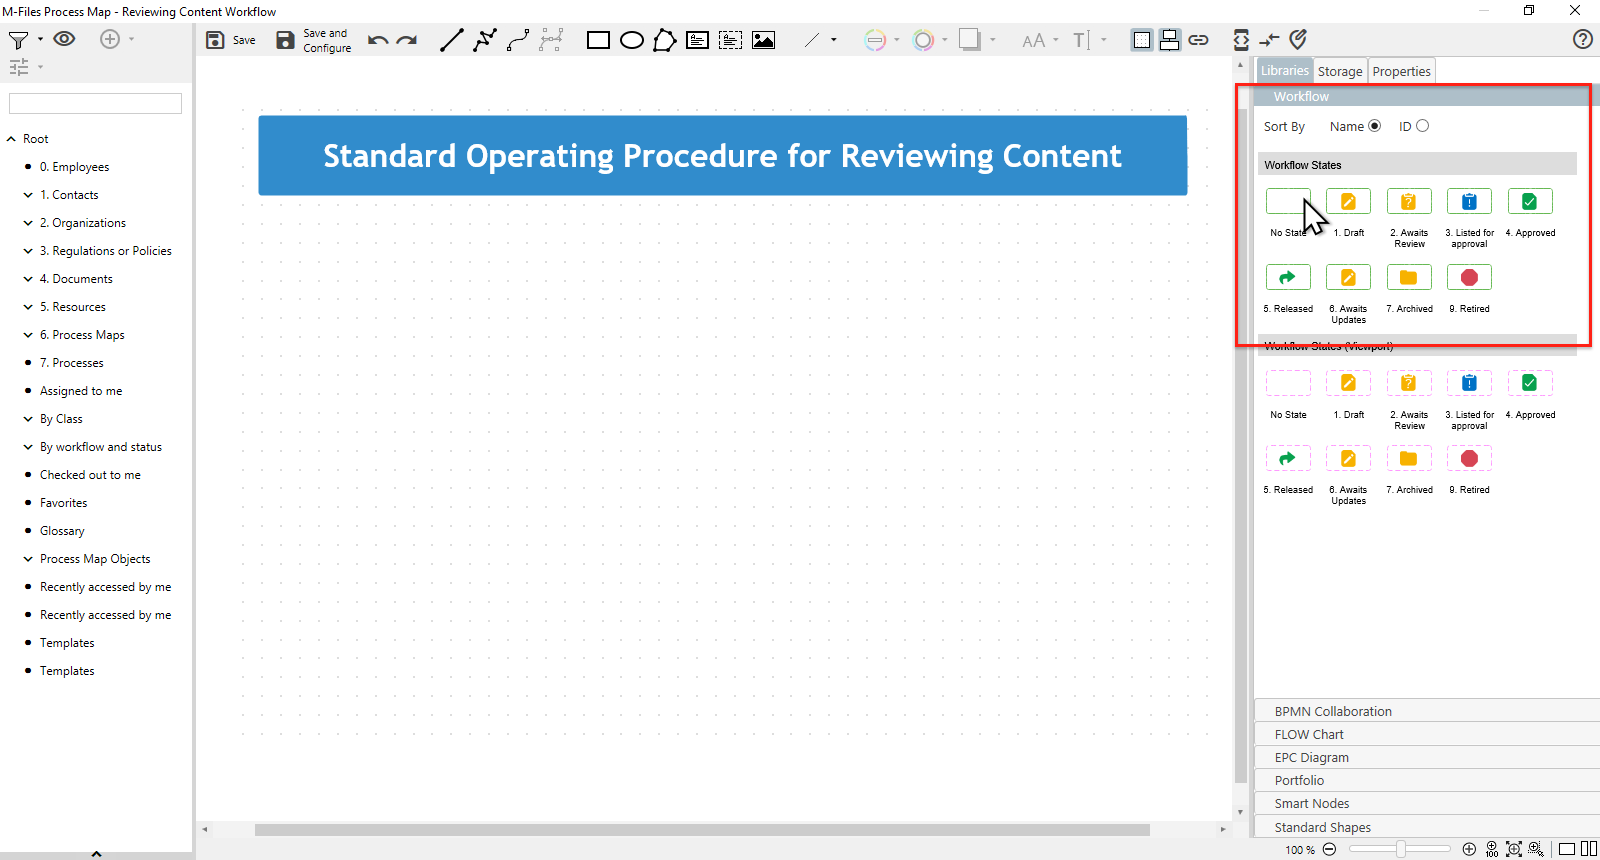
Workflow maps provide the workflow states of the selected M-Files workflow as green symbols in the libraries tab. You can drag them onto the canvas from the right-hand side. Note that every WF state can only be used once on the map.
Workflow Nodes are shown with the standard M-Files icon which you can set in the built-in value list “Workflow state” in M-Files Admin (see M-Files User Guide). If you do not want to display these icons you can deactivate them by using Hide MF-icon.
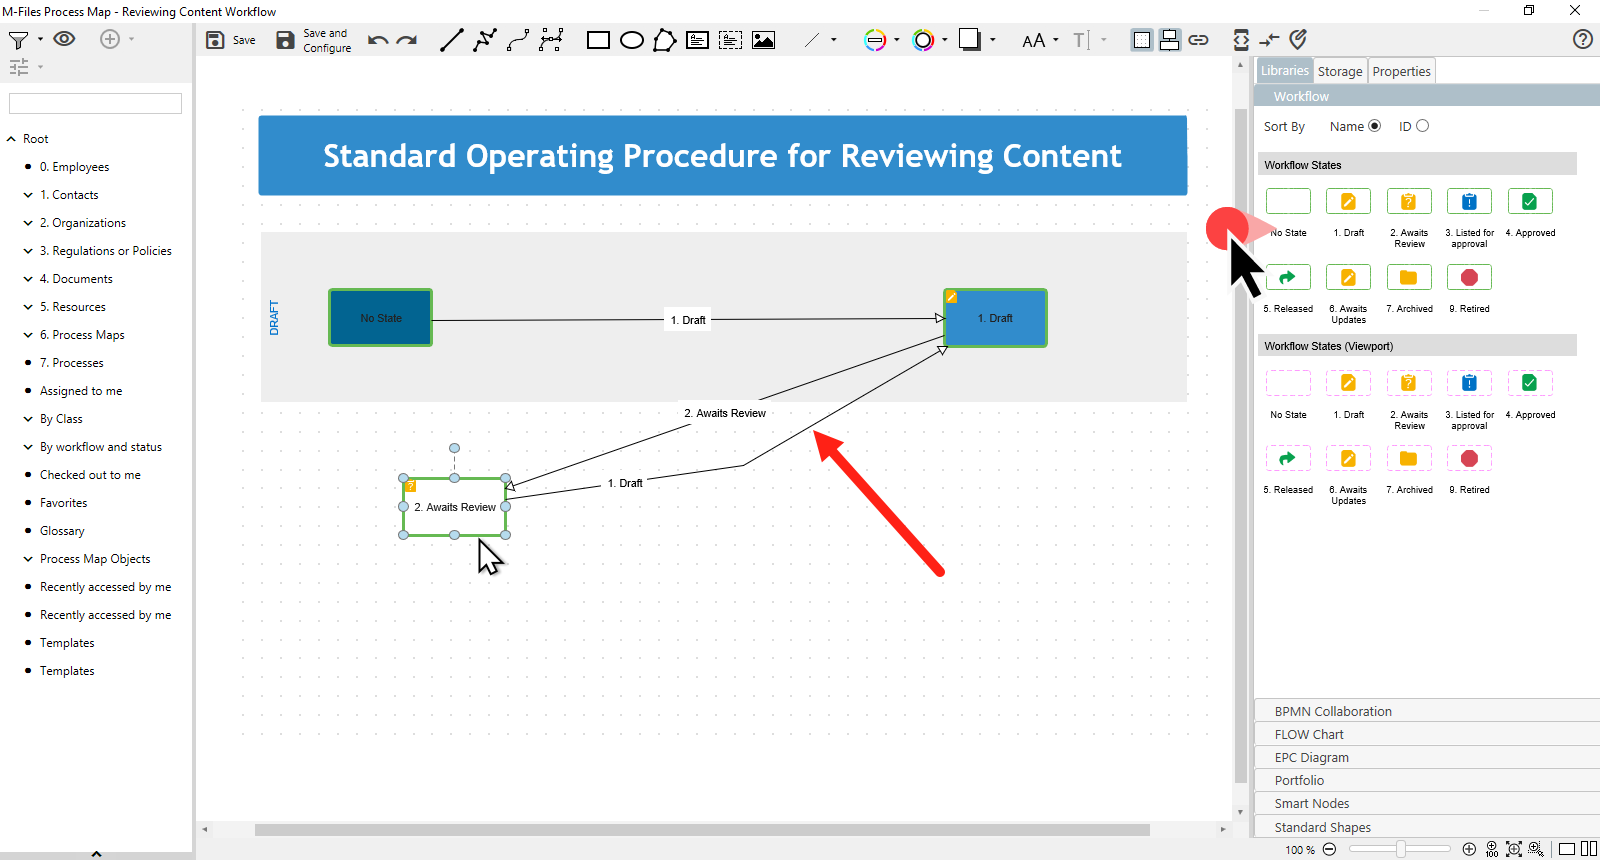
When you drop a workflow state symbol onto the canvas the system automatically checks, if there are state transitions that allow you to draw a line.
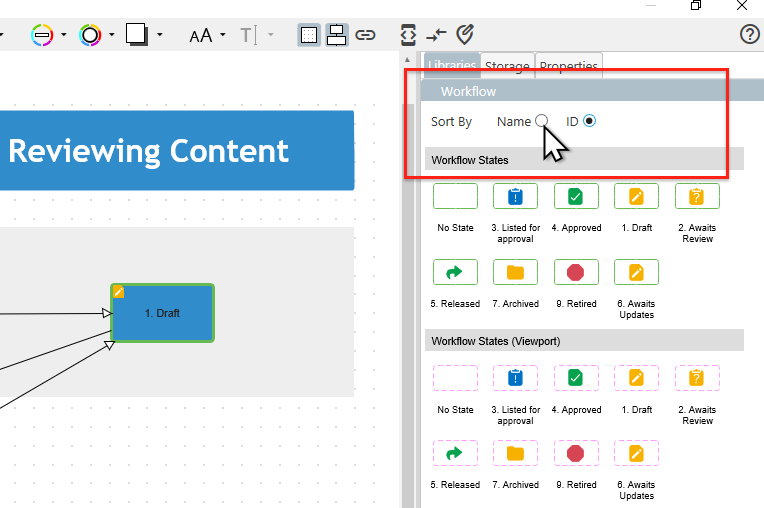
You can sort the workflow states by name or ID to see them in the right order even if their names are not sorted right.
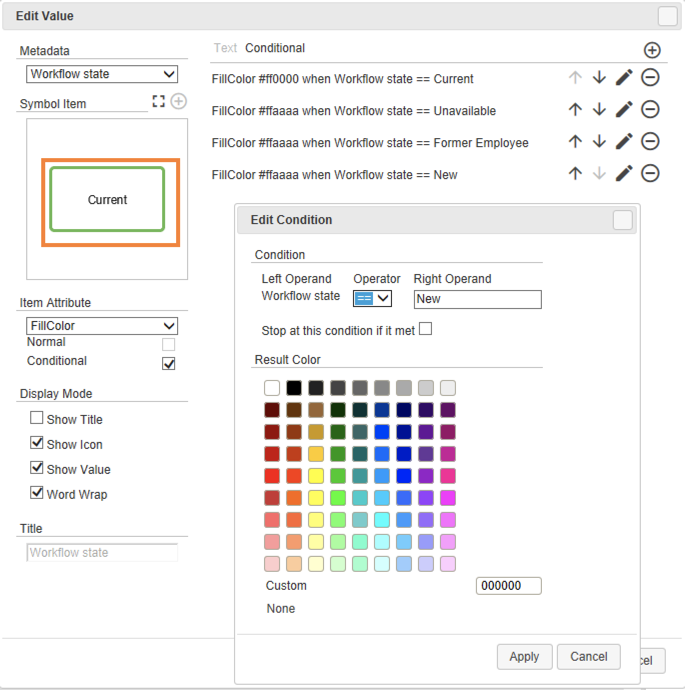
The symbols are pre-defined with dynamic values that change the color and line style based on conditions of the 'associated object'. These colors can be changed manually.
Save and Configure - Workflow Tab
The Save and Configure dialog (see Save and Configure) provides a tab to specify and enable/disable additional behavior:
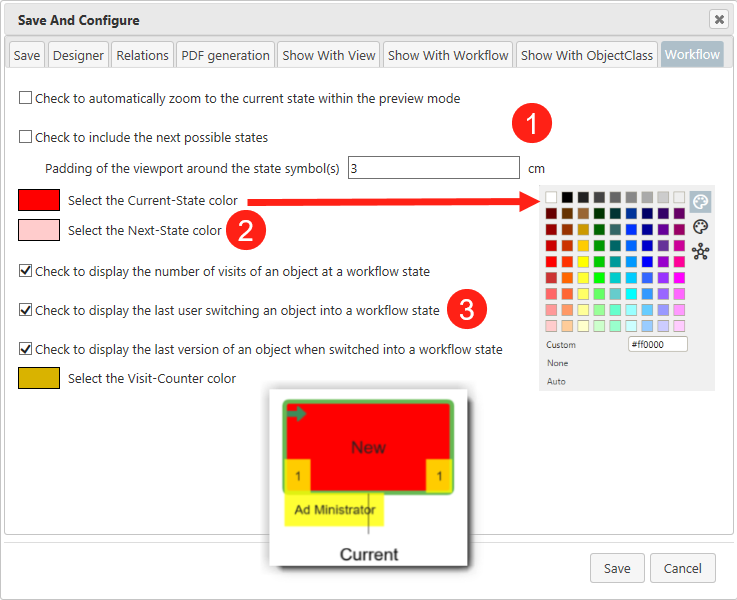
- The first checkbox causes an automatic zoom into the current workflow state. With the checkbox below you can determine whether the previous state(s) and the possible future state(s) should also be included in the zoom. You can also define how much padding space there is around the zoomed viewport. This functionality is especially useful for the magenta-colored workflow viewports.
- When you click on the colored box, a color palette will open. From this you can choose how the Current-State, as well as the Next-State should be highlighted.
- The following checkboxes enables the display of prior workflow visits in yellow-colored rectangles. This functionality asynchronously loads the history of the associated object and counts the visits for each state.
If you do not like this to be displayed select and delete the yellow rectangle, or disable the functionality all together in the 'Save and Configure' dialog box. All yellow rectangles will be removed from your map.
Workflow Maps - Some Rules
Workflow maps are recalculated in the preview and some rules apply anytime you select an object on the workflow path. Here are some best practices suggestions:
- Workflow Maps require a well designed and tested M-Files Workflow as a base. You can use M-Files Process Maps to discuss workflows with a client. It helps with the documentation process and may also provide guidelines, but there is no backward link or technical interface to the M-Files workflow. Therefore it is a good idea to first fully implement the M-Files Workflow and then create the visual representation and interaction with process maps.
- Workflow states can only be used ONCE. So each of the states can only be put onto the canvas once. If you try to do this for a second time, you will receive the
 sign, prohibiting the drop.
 - The rule 'each workflow state on the canvas only once' applies regardless of the symbol type. This means that there can be EITHER a green symbol
 OR a magenta-colored viewport
  for a specific workflow state. However, both types of symbols can be mixed in your workflow map.
 - Workflow maps are powerful tools, so all other technical concepts including the usage of all notation symbols and commands are fully allowed. This includes smart nodes, conditional values, placeholder syntax and more.
- You do not have to use all workflow states, in many cases, there are technical workflow states, which a user never sees in real life… so you can omit those, you don´t like to see.
- The same applies to lines and connectors. You can delete them or rename them as you like.
Save and Configure: Show Maps with Workflow Steps

Do not confuse workflow maps (which interpret a selected object and dynamically zoom or highlight the current state) with maps displayed for a workflow or some worksteps as guidelines or cheat sheets. The latter can be configured by Admins so you have the privilege to assign a map to one or multiple workflows. This can be a regular map or a workflow map. To enable this function go to the 'Save and Configure' dialog of the map you want to dynamically show.
- Look in the 'Save and Configure' dialog for the tab
Show with Workflow. - Choose a workflow.
- Select one or multiple workflow states.
- Define a name e.g. 'WorkStep' or 'HELP' for the tab.
- Let it load lazy.
- Click
ADD
The map will be added to the central configuration and the map display will be executed after re-login when you select an object which travels on the desired workflow path AND is in one of the selected states. A typical use is a tab with “WORKSTEP” that gives you some tips about the current state and where to learn more.
Note: The functionality to configure maps to show a workflow is only available to Administrators. The link between the workflow and the map is stored in the central configuration - see here . And it is applied in the Client after re-login.-