−Table of Contents
Smart Nodes Concept
The idea behind the Smart Node functionality is to reduce the drawing and configuration workload by providing pre-defined compound elements (nodes). These nodes can be mapped with M-Files objects or views of your vault. A link between a Smart Node and an M-Files object or view can easily be created using drag and drop or the Quick Choice menu (a more detailed explanation follows below). Once connected the Smart Node will derive various types of information about the chosen object/view and display them dynamically.
Typical features of Smart Nodes are:
- Pre-defined graphical design
- Pre-defined interactivity
- Assignment of objects or views via drag & drop
- Auto-layout functionality of content within the node
- Advanced configuration via properties
Basic Knowledge of Smart Nodes
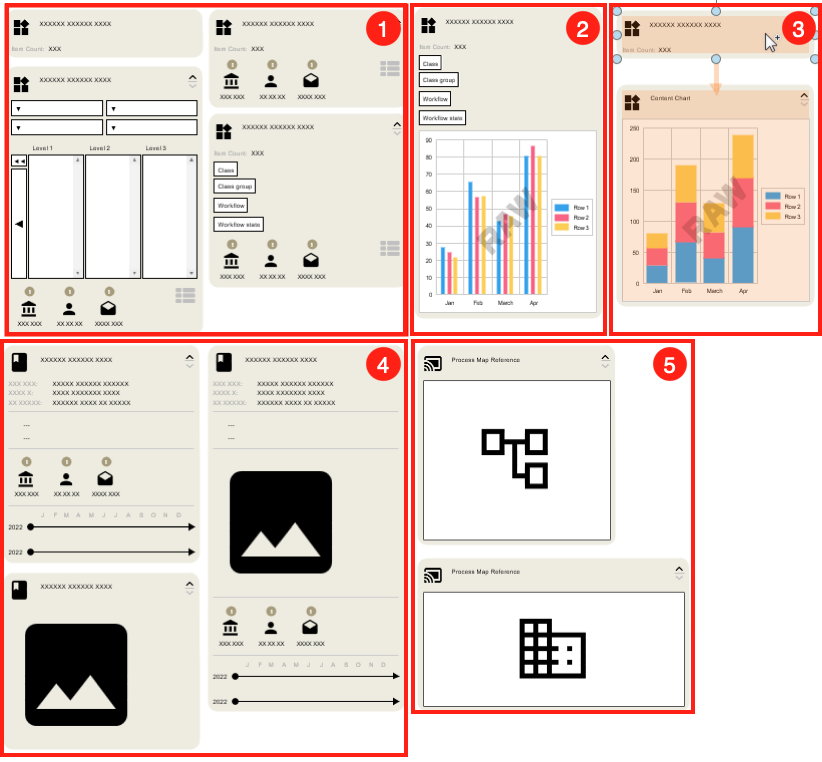
Smart Nodes serve different functions. Therefore five types of Smart Nodes exist: Smart Nodes for M-Files Views, Smart Nodes for Charting, Smart Nodes for Dashboarding, Smart Nodes for M-Files Objects, and Map by Reference.
- Smart Nodes for Views - are processing the included objects/documents of the chosen view and displaying them in a preset way. You can also choose between different types, which are treated here here.
- Smart Nodes for Charting - display the contents of an M-Files view as a graph. Those can be sorted by various properties and values. Click here if you want to learn more about charting.
- Smart Nodes for Dashboarding - allow to build a chain of queries, filters and charts which are connected to each other allowing dynamic interaction for example to see data from different perspectives. Click here to learn more about this topic.
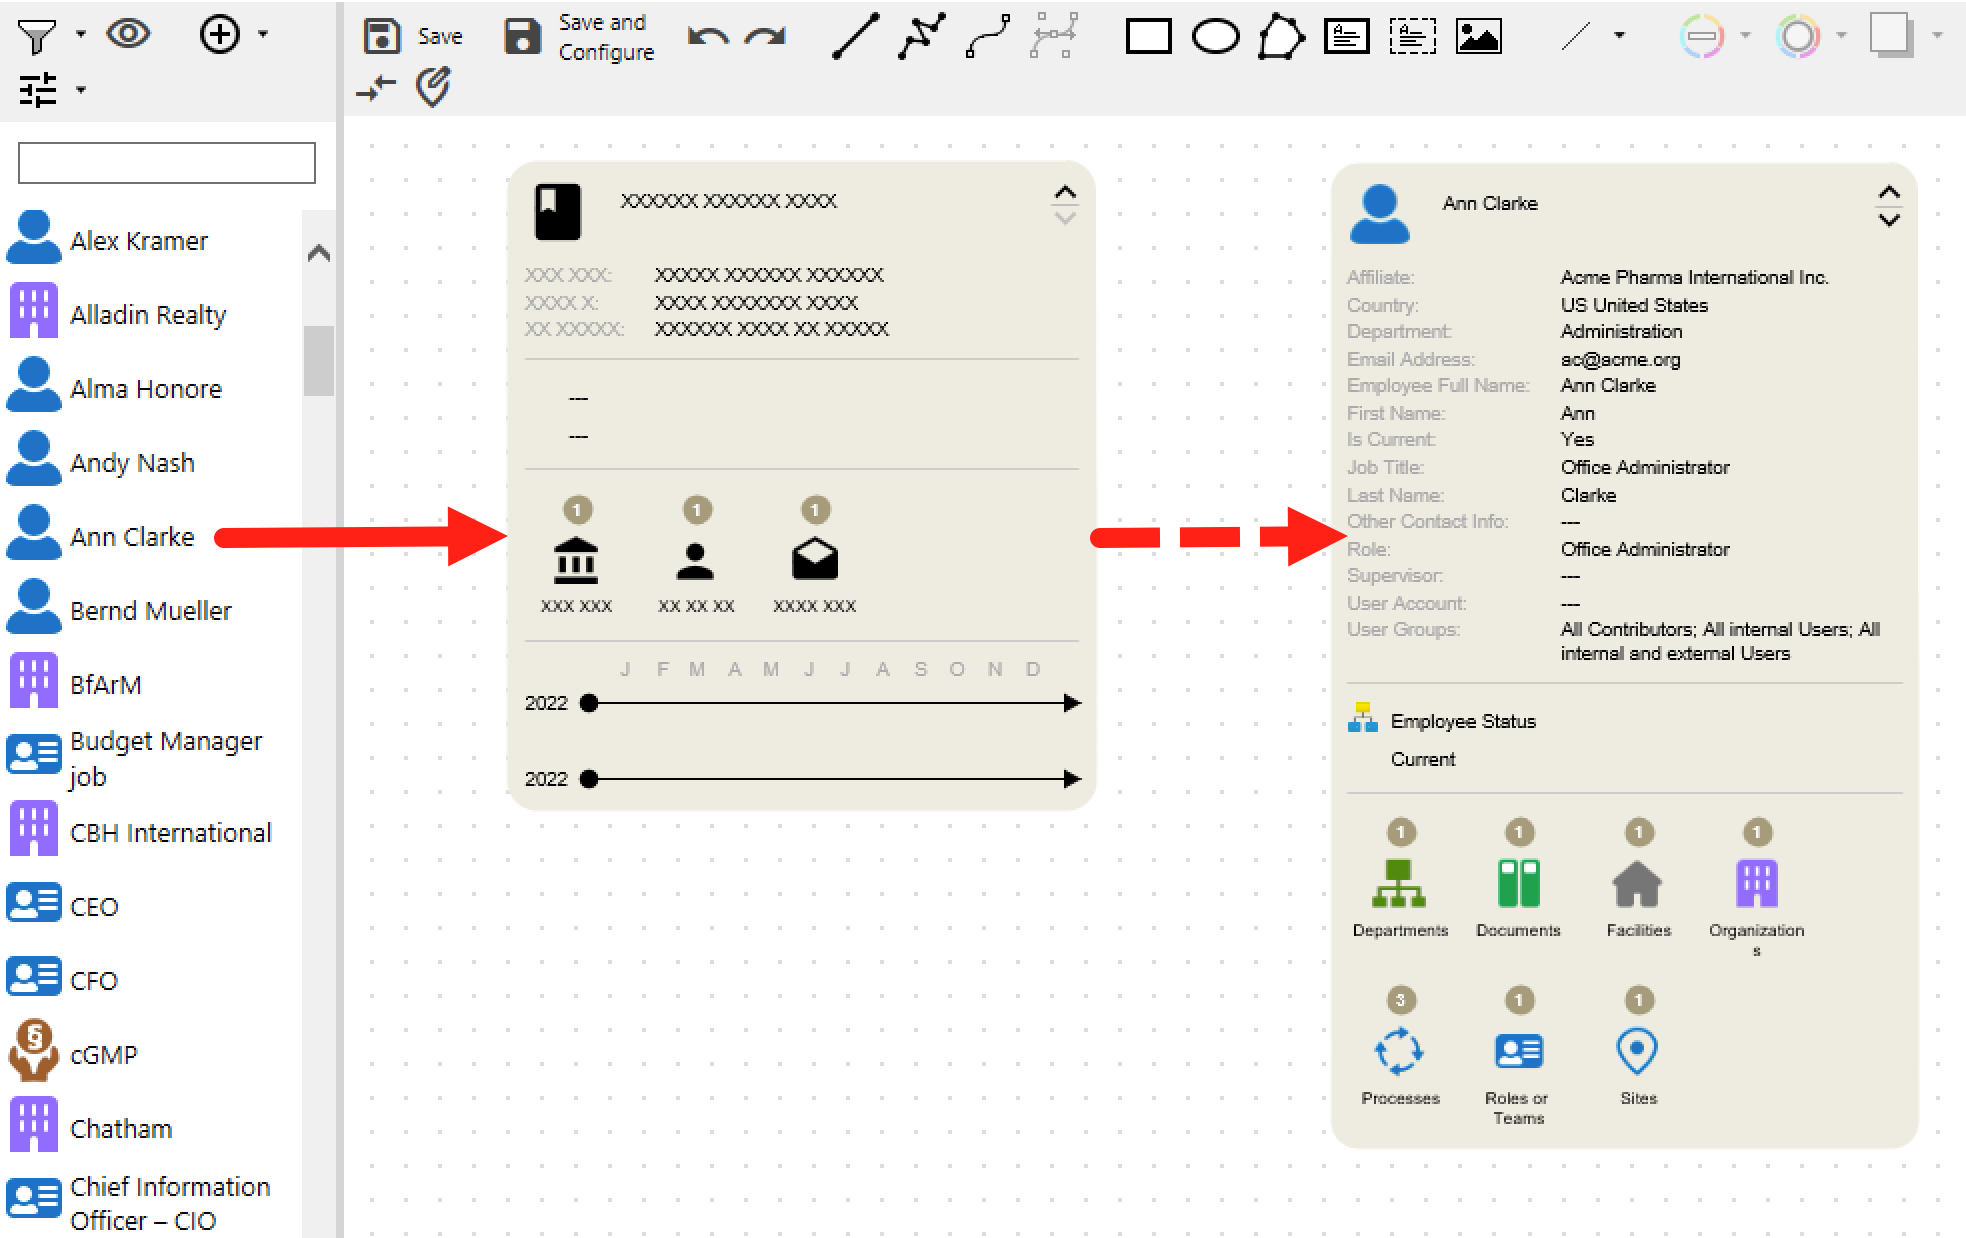
- Smart Nodes for M-Files objects - are used to display a wide variety of Metadata of the selected object. As you can see, there are three different types. Each of them has a different focus, which will be discussed in more detail here.
- Map by Reference - allows you to display the content of another map and interact with it. If you want to find out more about this powerful functionality, click here.
Note: Smart Nodes for Views and Smart Nodes for Charting only allow a view dropped onto them. M-Files Objects won’t have an effect. Conversely, M-Files Views can’t be dropped onto Smart Nodes for M-Files objects. Map by Reference, on the other hand, can only be linked to a Process Map.
Most Smart Nodes are variable in size. With the buttons in the upper right corner, the amount of information can be either increased ∨ or decreased ∧.
You may wonder why this is available: The primary reason is speed. The less information is to be displayed the faster a map is shown. Also, this mechanism allows for lazy loading - the required data can be pulled in the background or on-demand when the user expands the smart node.
Finally, there is an auto-layout algorithm that can be used to adjust the sizing of multiple Smart Nodes in one map in a way that they do not overlap. So they make space or reduce the space they need based on the size of the Smart Node. (See Move Nodes)
Structure of the Smart Node library
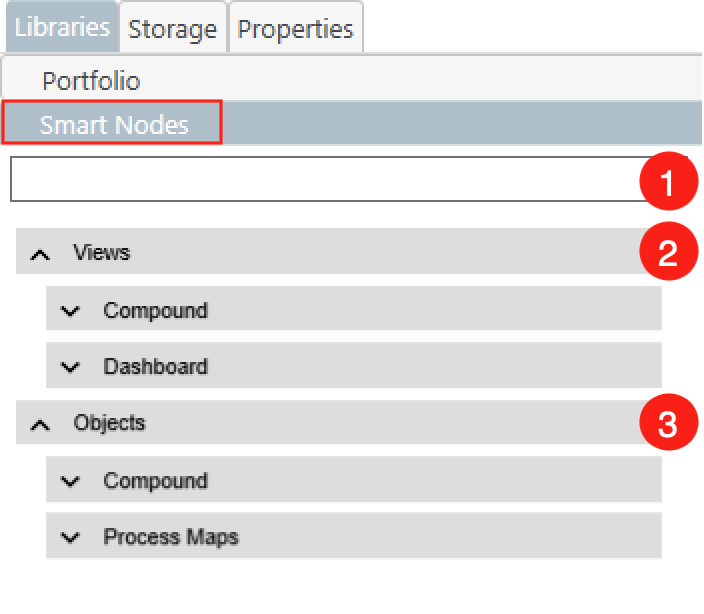
Smart Nodes are accessible in any notation via the Libraries tab on the right-hand side. The Smart Node section basically includes a search bar and two categories where the actual Smart Nodes are located. The individual categories can be expanded and collapsed by clicking on them.
- At the top of the Smart Node library is the search bar. Here you can enter keywords to directly find the Smart Node you are looking for. For example, if you are looking for a chart of the type Gauge, you do not have to scroll through the entire library, but can easily find it by typing its name.
- The category
Viewscontains all Smart Nodes that interact with M-Files Views. More precisely, Smart Nodes for M-Files Views and Smart Nodes for Charting can be found here. These two types are included in theCompoundtab. Furthermore, Smart Nodes for Dashboarding are located below it. - Smart Nodes that reference M-Files objects can be found in the
Objectscategory. Here you can find Smart Nodes for M-Files Objects, which are hidden behind theCompoundtab. In the tabProcess Mapsyou will find Map by Reference Smart Nodes .
Adding a Smart Node from the library
When a Smart Node is brought from the library to the Canvas, it is not initially linked to an Object or M-Files View. To change this, an object or view must be dragged from the left-hand pane and dropped onto the Smart Node.
Adding a Smart Node with the Quick Choice menu
If an M-Files object or view is brought from the left-hand pane onto the canvas, the depiction is automatically determined by the previously selected map type. But this is not the only potential representation.
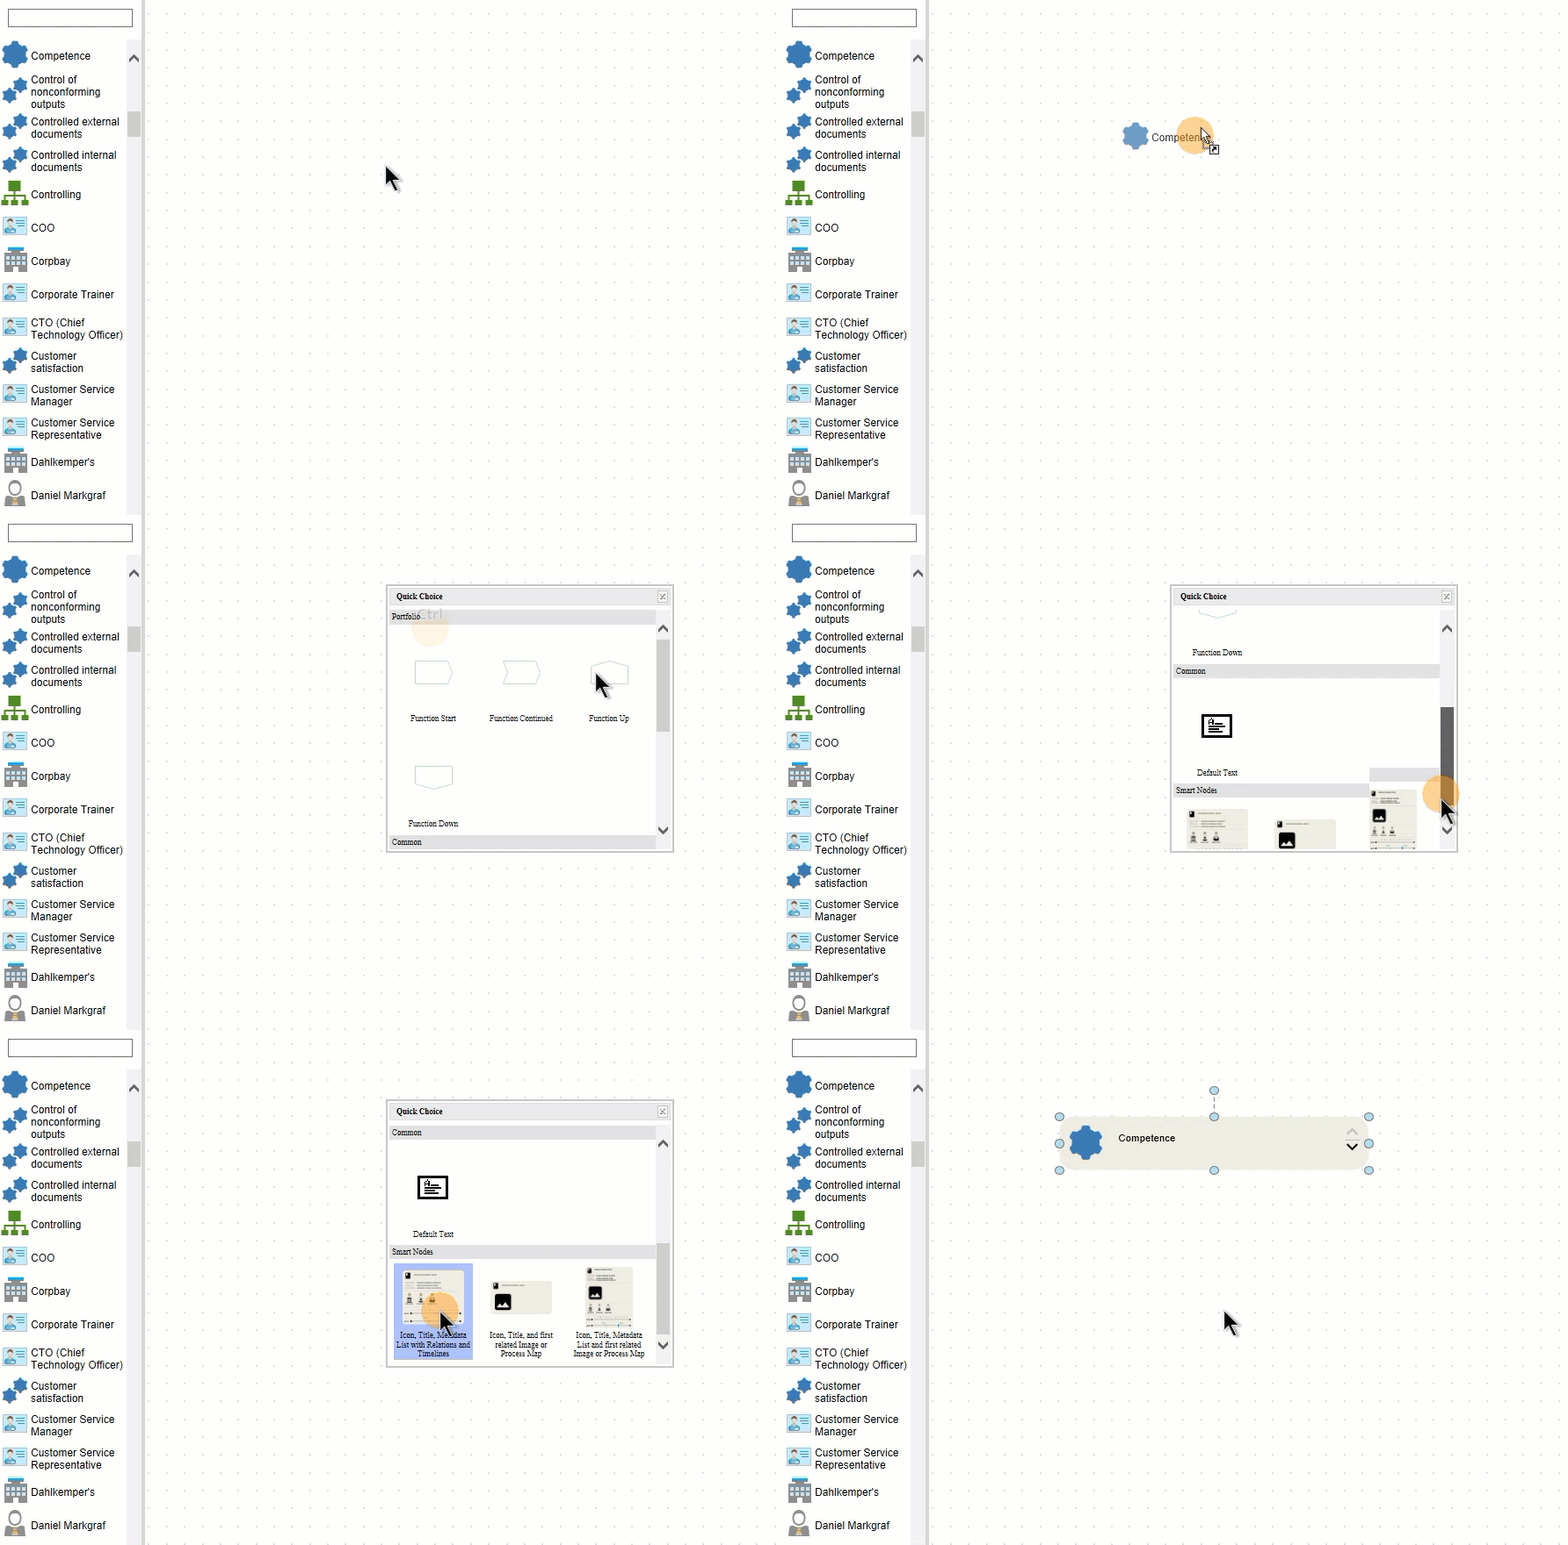
In addition to selecting an empty Smart Node from the library, you can also directly create a filled one by using the so-called Quick Choice menu. To access it, you must hold down CTRL while dragging an M-Files object or view onto the canvas. The Quick Choice menu you receive lists all potential representations, including the accessible Smart Nodes.
- Select an Object (i.e. a Process) from the left-hand pane.
- Start dragging it onto the canvas.
- Just before you drop it, press
CTRLand then drop the object. - The Quick Choice menu opens.
- Select the desired representation.
Note: The Quick Choice options provided in this box vary, based on the selected object and the centrally configured mapping. Different options appear for documents, images or process map, or views. See here, how to define the object mapping in the configuration.
Formatting Smart Nodes
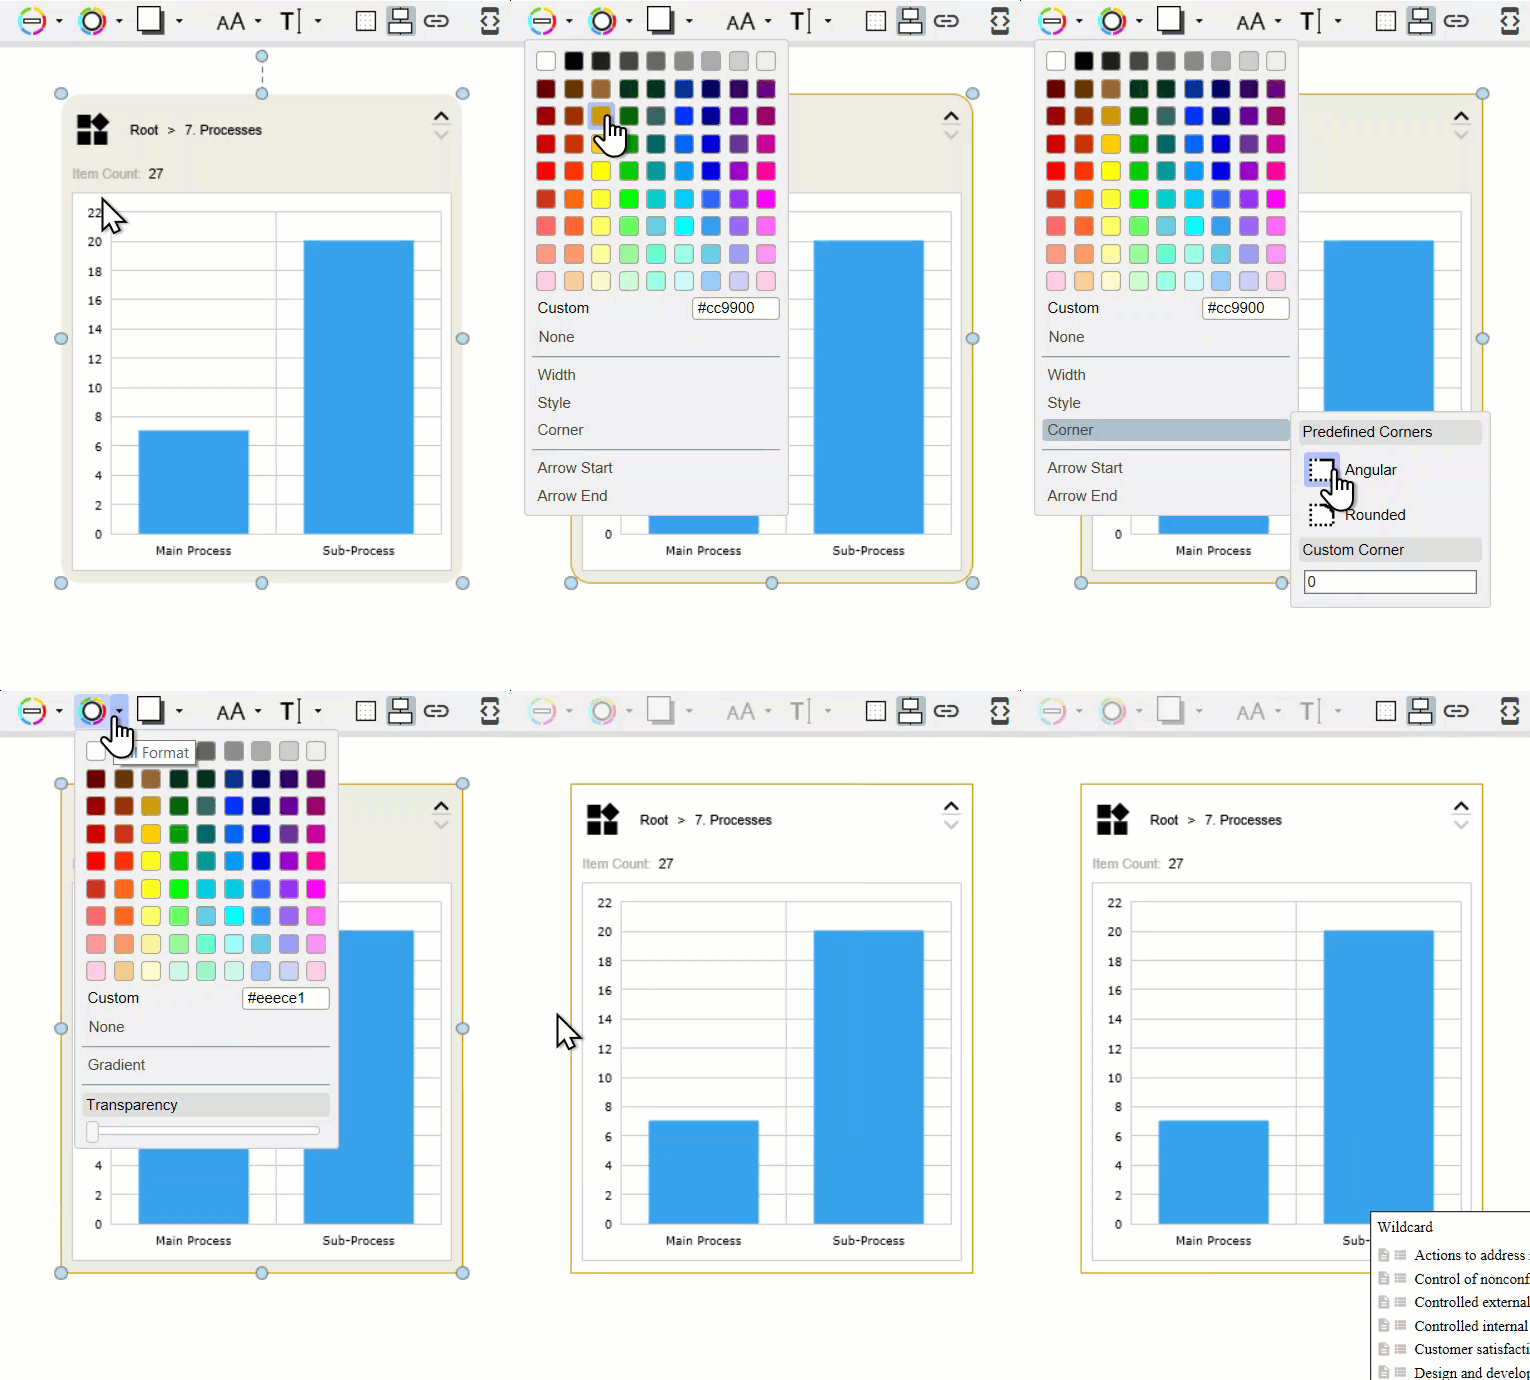
Even if Smart Nodes are created with a predefined layout from the Library, these elements can be formatted just like other standard shapes (see Lines, Fillings and Shadows).
For example, change:
- The width of the shape
- The line color and formatting
- The formatting of the corners
- The color of the filling
- The color and shape of the shading
