Table of Contents
Insert Images
Symbol images from other applications, scalable graphics and other image files can be added to the process map.
Do not use too large image files on your process maps, as this may increase the loading time in the Designer and within the Map Preview. Try to work with standard shapes and polygons instead. These can be freely changed in their shape and are dynamically scaled with the map.
Also: Prefer SVG vector graphics to image formats, if possible. If you have to use images, use the lowest possible resolution, do not use hi-res or print resolution images.
Add Image via Clipboard
- Open the application (e.g. MS Paint, MS PowerPoint) from which you want to copy the image.
- Copy the graphic, e.g. by selecting everything and transferring the image to the clipboard with the key combination
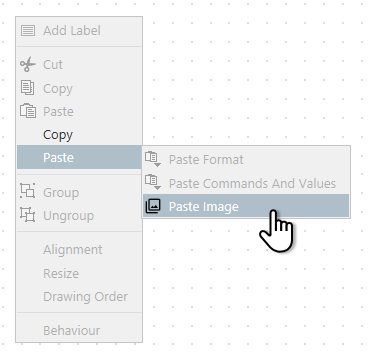
CTRL+C. - Now switch to the Process Maps Designer and click with the right mouse button onto the canvas.
- Move the mouse over the 'Paste' entry and wait until the submenu opens.
- Use the 'Paste Image' button to easily paste the image.
In many cases, you can simply use the key combination CTRL + C to copy the image and CTRL + V to paste the selected item onto the canvas.
Add Images via Drag & Drop
The easiest way to add an image is to drag & drop the image file from M-Files or the Windows Explorer onto the map.
- Locate the image file (scale this image file beforehand if necessary).
- Select it and drag it with the left mouse button to an empty area on the canvas.
Add Image via M-Files Object
Since version 1.8, images can also be loaded dynamically from M-Files objects. This is especially useful if you want to manage a central logo or image object which is used on several maps. This means that the image file is managed centrally by M-Files and therefore has the typical features such as version history.
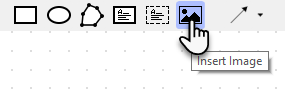
Use the “Insert Image” function in the upper toolbar:
- Click on the button, your cursor will change to a cross.
- Drag the image area onto the canvas in the size your image should be displayed later.
- Find your image in M-Files using the search bar in the left Object menu.
- Drag & drop the image to the image area on the canvas.
You can also use other M-Files objects if they are configured to carry files with them. Process Maps then chooses the first image file it finds (svg, jpeg, png).
Above: The 'person' object was configured to 'Objects of this type can have files'. As a result, when throwing an person object on the 'drop image here' zone, the system will look into the object and access the associated picture.