Table of Contents
Create Anchors and Viewports
The idea is that you can create multiple drawings on an unlimited canvas. All drawings within your map - you could call them sections or sub-maps - are available to be navigated to. The core function is to zoom into a viewport when you click on the anchor.
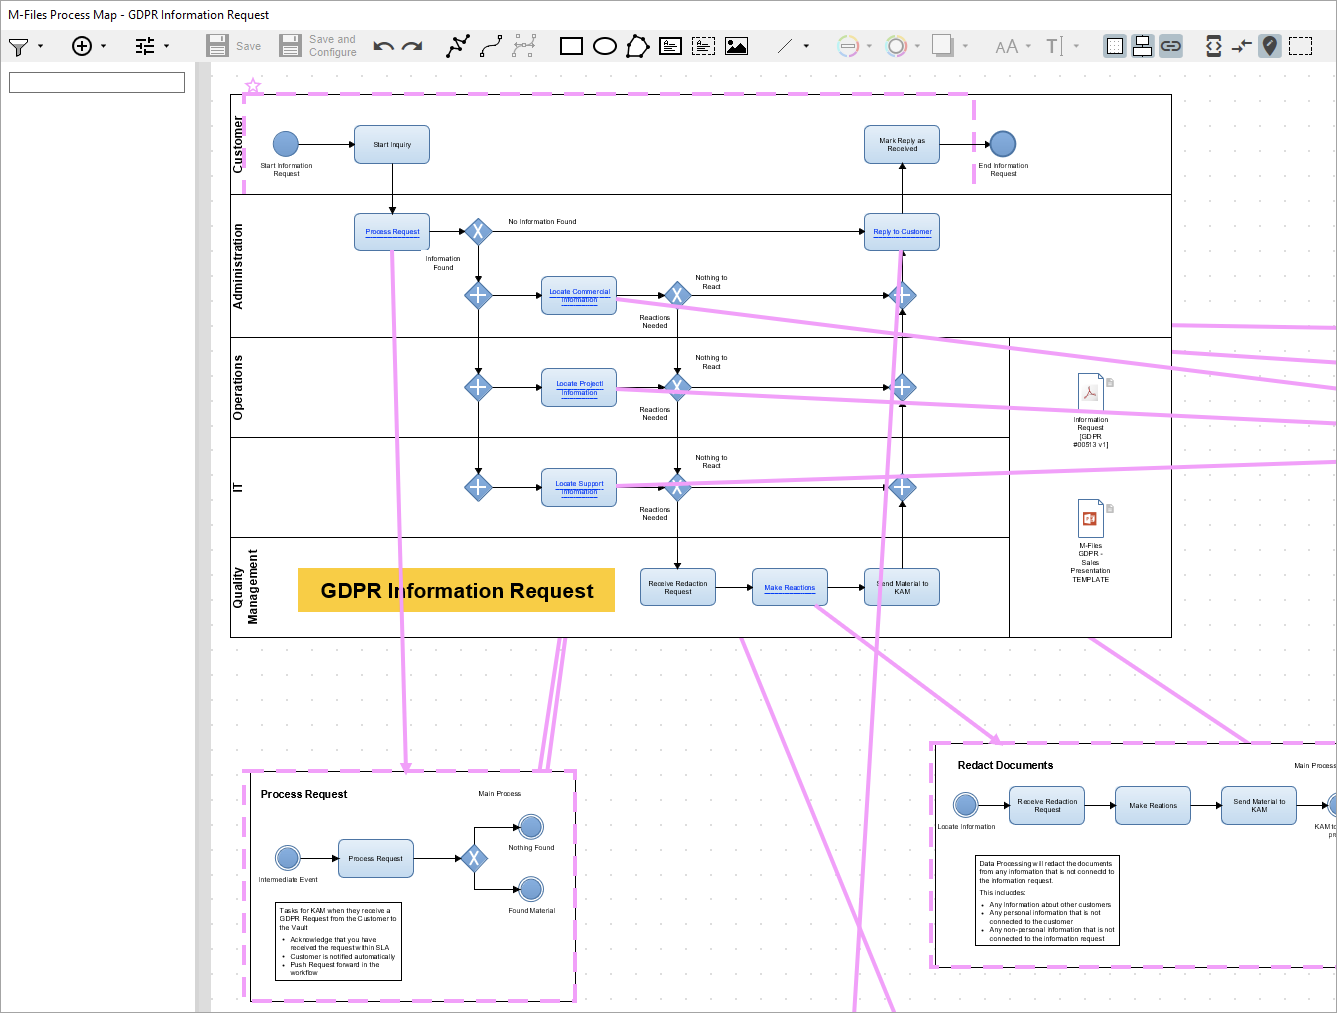
| Viewport | A rectangle as a dashed line, magenta-colored. |
| Anchor | A node (shape or symbol) calling the trigger to zoom to the viewport, when pressed. By default, anchors indicate that they can be clicked, by changing the mouse cursor when hovered over it. |
Switch the designer to 'Viewport Mode' (icon in the toolbar) in order to edit anchors and viewports.
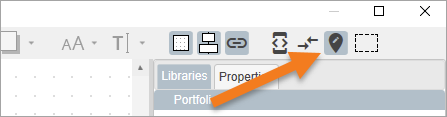
The  icon is now toggled and already created viewports and anchors are shown magenta colored.

Viewports can be created in two ways:
1. You can create a viewport manually with the icon in the toolbar. 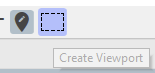
- Click the icon, move the mouse.
- The mouse cursor changes to
+ - Create the desired viewport as a magenta-colored dashed rectangle.
- You can still move the viewport around and change its size. Also, you can edit its properties, e.g. you can give it a name.
- If you select it, the viewport edit icon appears to add an anchor or make the viewport the default viewport for the map.
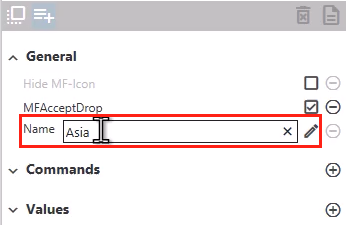
- When you create a viewport in this way, you can assign a name in its Properties.
- This is essential to have an clear overview even if you have multiple viewports on a map. For example, if you want to display a specific viewport using a Map by Reference Smart Node, you can access it directly using its name. If you want to learn more about the use of Map by Reference Smart Nodes, click here.
2. You can also create a viewport by selecting an existing rectangle, shape or image.
- Clicking the EYE tool
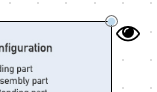 converts the rectangle into a viewport. Now you can see the magenta dashed line and are offered three icons.
 - Next you can select the anchor tool and point from the viewport to the anchor. Make sure the anchor tool connects with the targets` red connector ports in order to successfully link anchor and viewport.

In the viewport mode a couple of limitations apply:
- You can not save the map in this mode (icons in the toolbar are disabled). You have to leave the mode prior to saving.
- Selected objects show the “anchors and viewports” context menu.
- Dashed viewport rectangles are only shown in the viewport mode. They are not shown nor are they selectable when you are in the regular drawing mode.
- Dashed viewport rectangles typically are on top of the drawing, so selecting elements in lower layers becomes difficult sometimes.
This is why you should leave the viewport mode when you are done with editing anchors or viewports, by pressing again.
Anchor icons to create a Jump Command
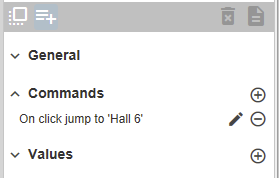
The anchor icon  lets you draw a line to the anchor. The tool then creates a command on the target object to jump to the viewport.
- The arrow
 creates a jump command from the target (anchor) to the viewport. The trigger is a click on the symbol itself. If the anchor carries text, the text is highlighted in preview to indicate that a click triggers the action command.
 - The arrow with the target icon
 creates a jump command from the target (the icon) to the viewport. The trigger is a click on the icon itself.
Deleting Viewports
There are two different ways to delete a viewport:
1) If you have manually drawn a viewport rectangle, you can select the magenta-colored rectangle and press
DEL or CTRL+X
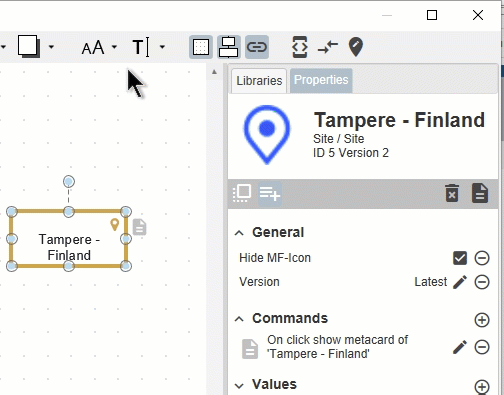
2) If you converted an existing element (rectangle, shape, image) into a viewport, then you cannot delete the magenta viewport. You have to use the  icon. It disables the viewport functionality of the object.
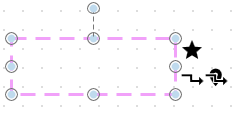
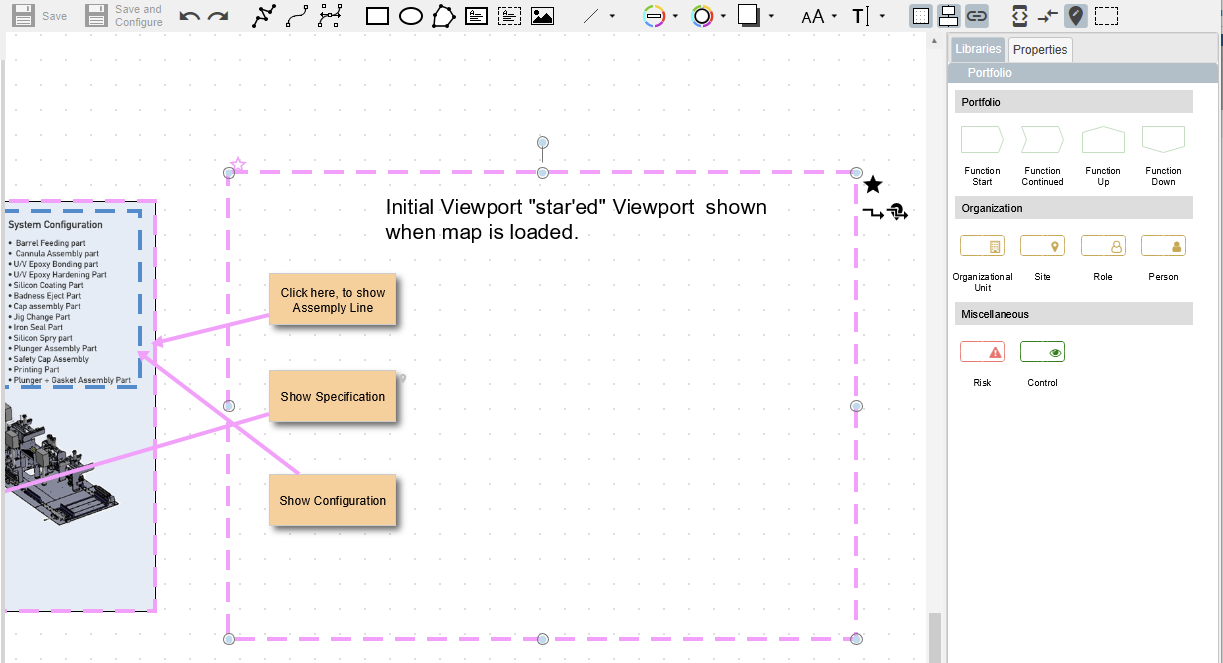
Default Viewport set with the star
The  is a drawing wide toggle to indicate that this viewport becomes the initial viewport, shown directly after loading the map preview.
This is indicated by a magenta-colored star
is a drawing wide toggle to indicate that this viewport becomes the initial viewport, shown directly after loading the map preview.
This is indicated by a magenta-colored star  shown on the top left corner of the viewport.
Note:
There can only be one default viewport on a map. When you select the star on one viewport, it disappears from another viewport elsewhere on the map.