Table of Contents
Create New Commands
We recommend to create commands to make your maps more interactive and to enable direct actions on M-Files objects:
- Deactivate the
Enable Command Iconsbutton if it is active. In this way, mouseover effects will not disturb you when editing the elements.
 - Select an element that has been linked to an M-Files object.
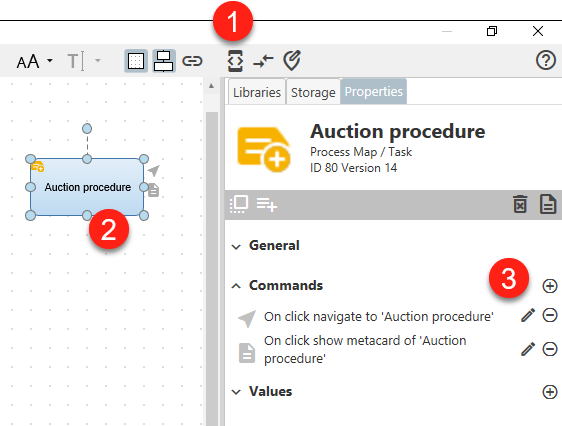
- Navigate to the
Commandsarea on the right-hand side of the Properties menu. Click on the icon next to the section header. The
 Add New Commandwindow opens.
In this window, commands can be created in four simple steps:

- Item determines WHAT is clicked
- Trigger determines HOW to click
- Action determines WHAT happens after the click
- Target determines WITH WHAT something should happen
Sometimes it can be very helpful to reverse the steps (first Target, then Action to Item), e.g. when you are considering which M-Files object or target you want to perform an action on.
Click on Add to add the new command. You will notice that your item now has an additional grey button or mouseover effect (you may need to re-enable the Enable Command Icons button  to see and test the command).
Item

- In the Items area you can choose to click directly on the
symbol(similar to clicking on a button) or if a gray commandiconis displayed next to the symbol or element. - You can define the shape of the icon by clicking the button
 and selecting an icon.
 Please note that the icon is displayed at the top of the command name. Some actions within the commands (such as Navigate, Metacard, etc.) have their own pre-defined icons to maintain consistency with automatically generated command icons. It is therefore possible that the icon changes as soon as you select an action.
- By clicking on
More icons…you will be offered even more icons to choose from; so that you can point out special actions (e.g. calls to external URLs) with a descriptive icon.
Since version 2.0 it is possible to execute multiple commands with one click. This makes sense whenever multiple actions are to be executed simultaneously (e.g. injection of a view path into multiple smart nodes for dashboarding). To use the function, Symbol must be selected in the Item area.
Trigger
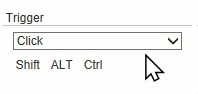
In the Trigger area, you can select how the action call is triggered. Various mouse and keyboard combinations are available here. Select a mouse action from the drop-down menu and link it to a keyboard shortcut by activating Shift, ALT or Ctrl.
Action
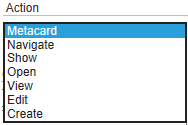
In the third step, you can select an action to be executed after the trigger is called. You can choose between:
- Calling the Metadata Card (Metacard): You can open the object's Metadata card. This action is also automatically generated when you apply a new object to the canvas.
- Shows the preview of a process map (Navigate): This command can only be linked to other process maps. It causes the preview of another process map to be loaded into the same map tab.
- Displaying the object in M-Files Client (Show): The M-Files Client is opened in the shell listing area (same window) or in a new window and the object or view is displayed, e.g. to navigate or open the 360° view.
- Opening the object in check-out editing mode (Open): You will be offered to open the object in the native application, e.g. Microsoft Word. Before opening, you are asked whether you want to check out.
- Display the object in read-only mode (View): The document is displayed in read-only mode without prompting.
- Direct check-out and editing of the object (Edit): The document is opened in checkout mode without prompting.
- Creating new objects (Create): You can create new objects of the same or a different object type (also using templates) directly from the map in M-files with one click. This action is very suitable for creating new tasks, tickets or documents within a map.
New objects can be created directly from a template (see Create New Objects with a Reference Object).
This function is very useful e.g. to create documents or articles for an organizational unit because the metadata is inherited and relationships are created automatically.
Please note that the action changes automatically when you call a specific target. For example, it changes to Jump when you want to jump to a specific anchor location. When you call M-Files Views or URLs, the action automatically changes to Show, and so on.
Target
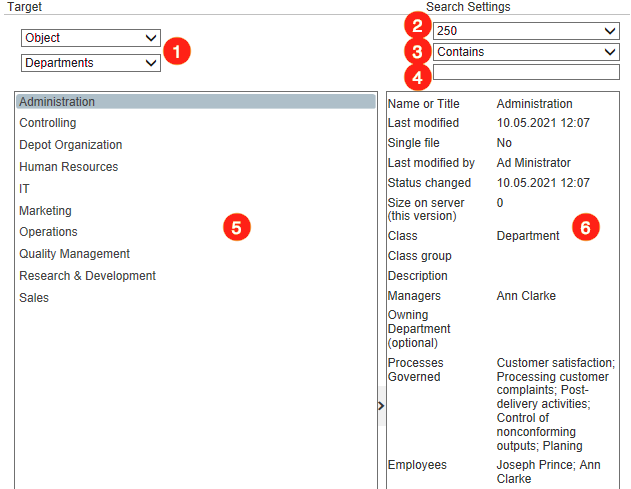
The Target area is the most complex area of the Add New Command window. It displays functions for various target specifications:
- The selection of the target type
- Object
- Anchor
- View
- URL
- Set the maximum number of listed objects. By default 250 is the upper limit.
- Define the search options for using the search bar down below. You can either search for an object that
Contains,Starts With, orMatches Patternof your input. - Search bar to find a target
- The list of available targets to select the right one
- Details of the target (metadata and other information)

If you select Object as the target type, you can perform the actions described above on M-Files objects. Select an object type to customize the list of available objects or use the search bar to find the object you need.

If you select Anchor as target, you can create commands that jump to target areas within the same or a different process maps using Jump commands. For more information see Anchors and Viewports.
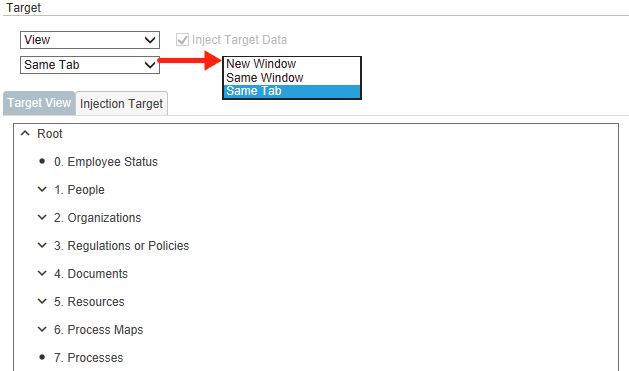
If you select View as a target, you can use this command to jump to a selected M-Files view. You can also choose if the view (list in M-Files Client) is displayed in the same window or in a new one.
However, if you select Same Tab you can inject the selected view into a Smart Node for M-Files Views or Smart Node for Charting on the map. The detailed procedure is discussed below.
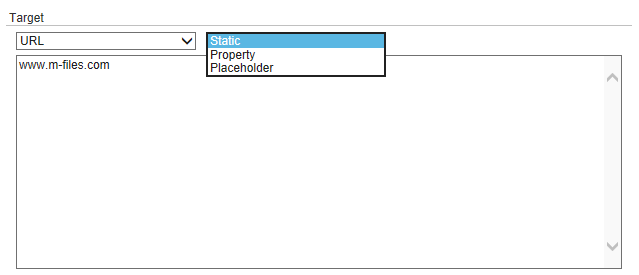
If you select URL as a target, you can jump to a selected static or dynamic URL, e.g. to call a link in another application or an API call. You can choose:
- Static URL (e.g. http://www.m-files.com): The command is always used to call up the same URL.
- Property URL (e.g. the reference URL of an M-Files object or
mailto:): The command calls a URL that is stored on the M-Files object and can be changed there. - Placeholder URL (e.g. https://www.google.de/search?q=%PROPERTY_0%): A custom URL or URI can be invoked by a command to integrate a Web service via a URL such as Skype calls, custom maps on Google Maps, direct calls, or text messages via telephone services such as a TAPI interface.
Inject View Paths into Smart Nodes
As described before, views can be injected into a Smart Node for M-Files Views or Smart Node for Charting. To do this, another element must be provided with the appropriate command and triggered. This is especially useful if you want to cover a large number of different views on your map and work as performance efficiently as possible.
To get started, for the sake of clarity you should give the selected Smart Nodes a name first. How to do this can be seen here.
Now we get to the creation of the actual command:
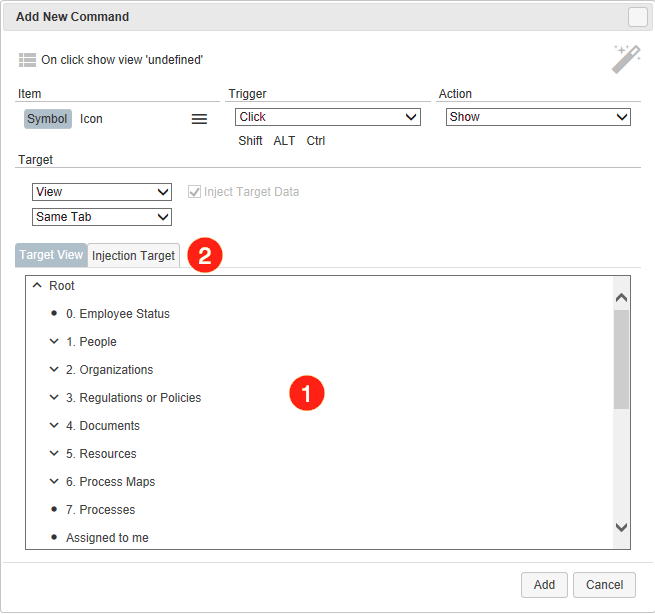
- Select the view that the Smart Node should adopt. If there is a down-facing arrow in front of a view, this suggests that this view contains further sub-views which can also be accessed.
- Then select the tab
Injection Target.
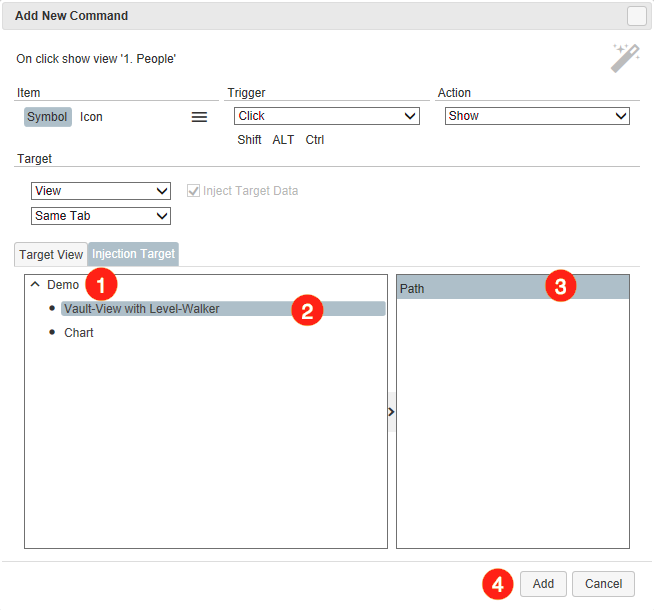
- Here you will find at first glance the name of the map you are currently on. Click on the down-facing arrow to get a list of Smart Nodes on the map. At this point, the initially assigned name comes into effect
- Select the desired Smart Node
- Click on
Pathin the list next to it. - Confirm your entries with
Add.
And this is what the just created command could look like in action:

Edit or Delete Commands
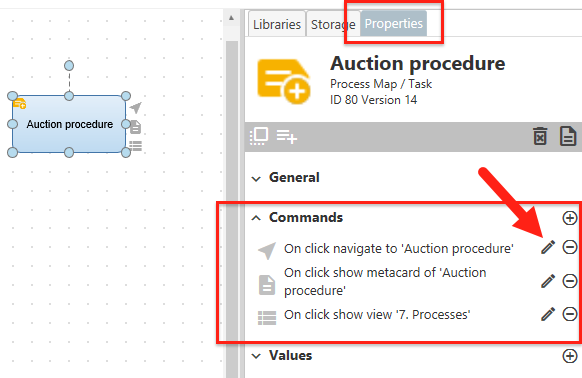
After generating (also automatically generated commands) you can edit or delete them. To do this, select the element and open the Commands area on the Properties tab page:
- Select the button
 to open the window
 Edit Command, which is structured analog toAdd New Command. Here you can change the settings of the respective command. - Select the
 button to delete a command from the list. Attention: There is no dialog to confirm the deletion.
Rename Commands (tooltip over command icons)
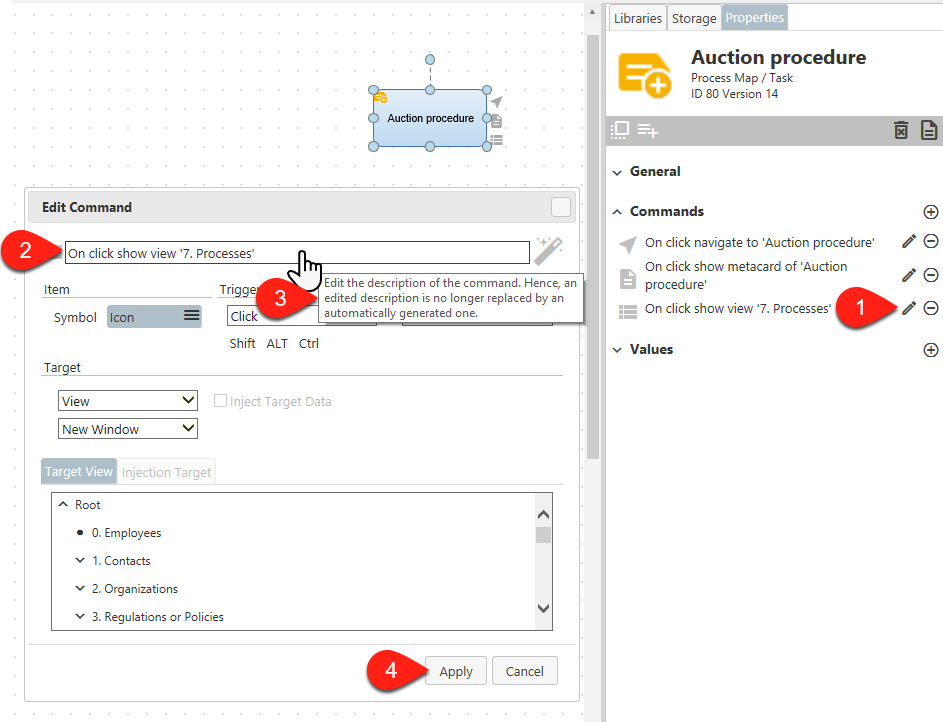
The commands are preset with automatic texts for their title and tooltip when they are created. If these contents are inappropriate, they can be easily changed.
- Click the pencil in the Properties menu to edit an existing command.
- Then simply click on the name of the command in the “Edit Command” menu.
- Inline editing is activated and you can overwrite the name with an individual entry.
- When typing, make sure that the name of the command no longer automatically reflects the function of the button. Therefore, please choose a meaningful name.
Access Command Icons
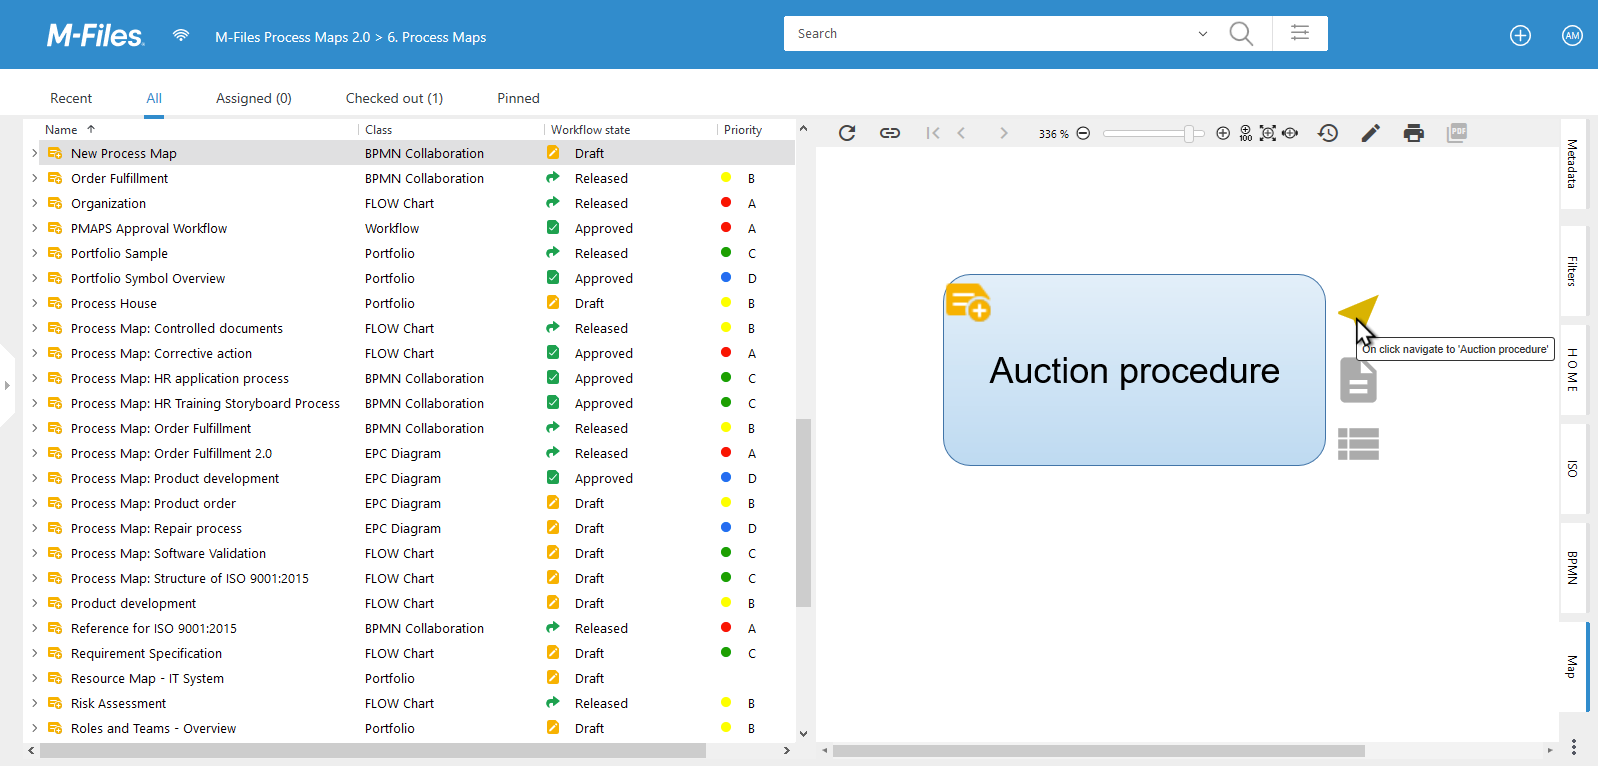
The interactions are accessible in the Map Preview for users who have the necessary rights (M-Files user rights are taken into account). For more information see The Process Map Preview Tab.