

meta data for this page
Symbol Mappings
Simply drag & drop M-Files objects from the left-hand pane onto the canvas to use them in your Process Map. Any M-Files object that was not given a pre-defined symbol mapping turns into a rectangle with the class icon as default appearance. In the MF-Admin configuration, M-Files Objects can be assigned to comparable symbols of the modelling notations.
For example in flow charts you have so called 'off-page-connectors' as a symbol. They show where the workflow continues on another page or in another chart. So it makes sense to map this symbol with the pre-defined propcess map object. Another example would be documents. Most notations have a specific shape for a document or for a database or IT-system. By mapping these symbols with M-Files objects you no longer receive the standard rectangle shape, when dropping objects or documents onto the canvas.
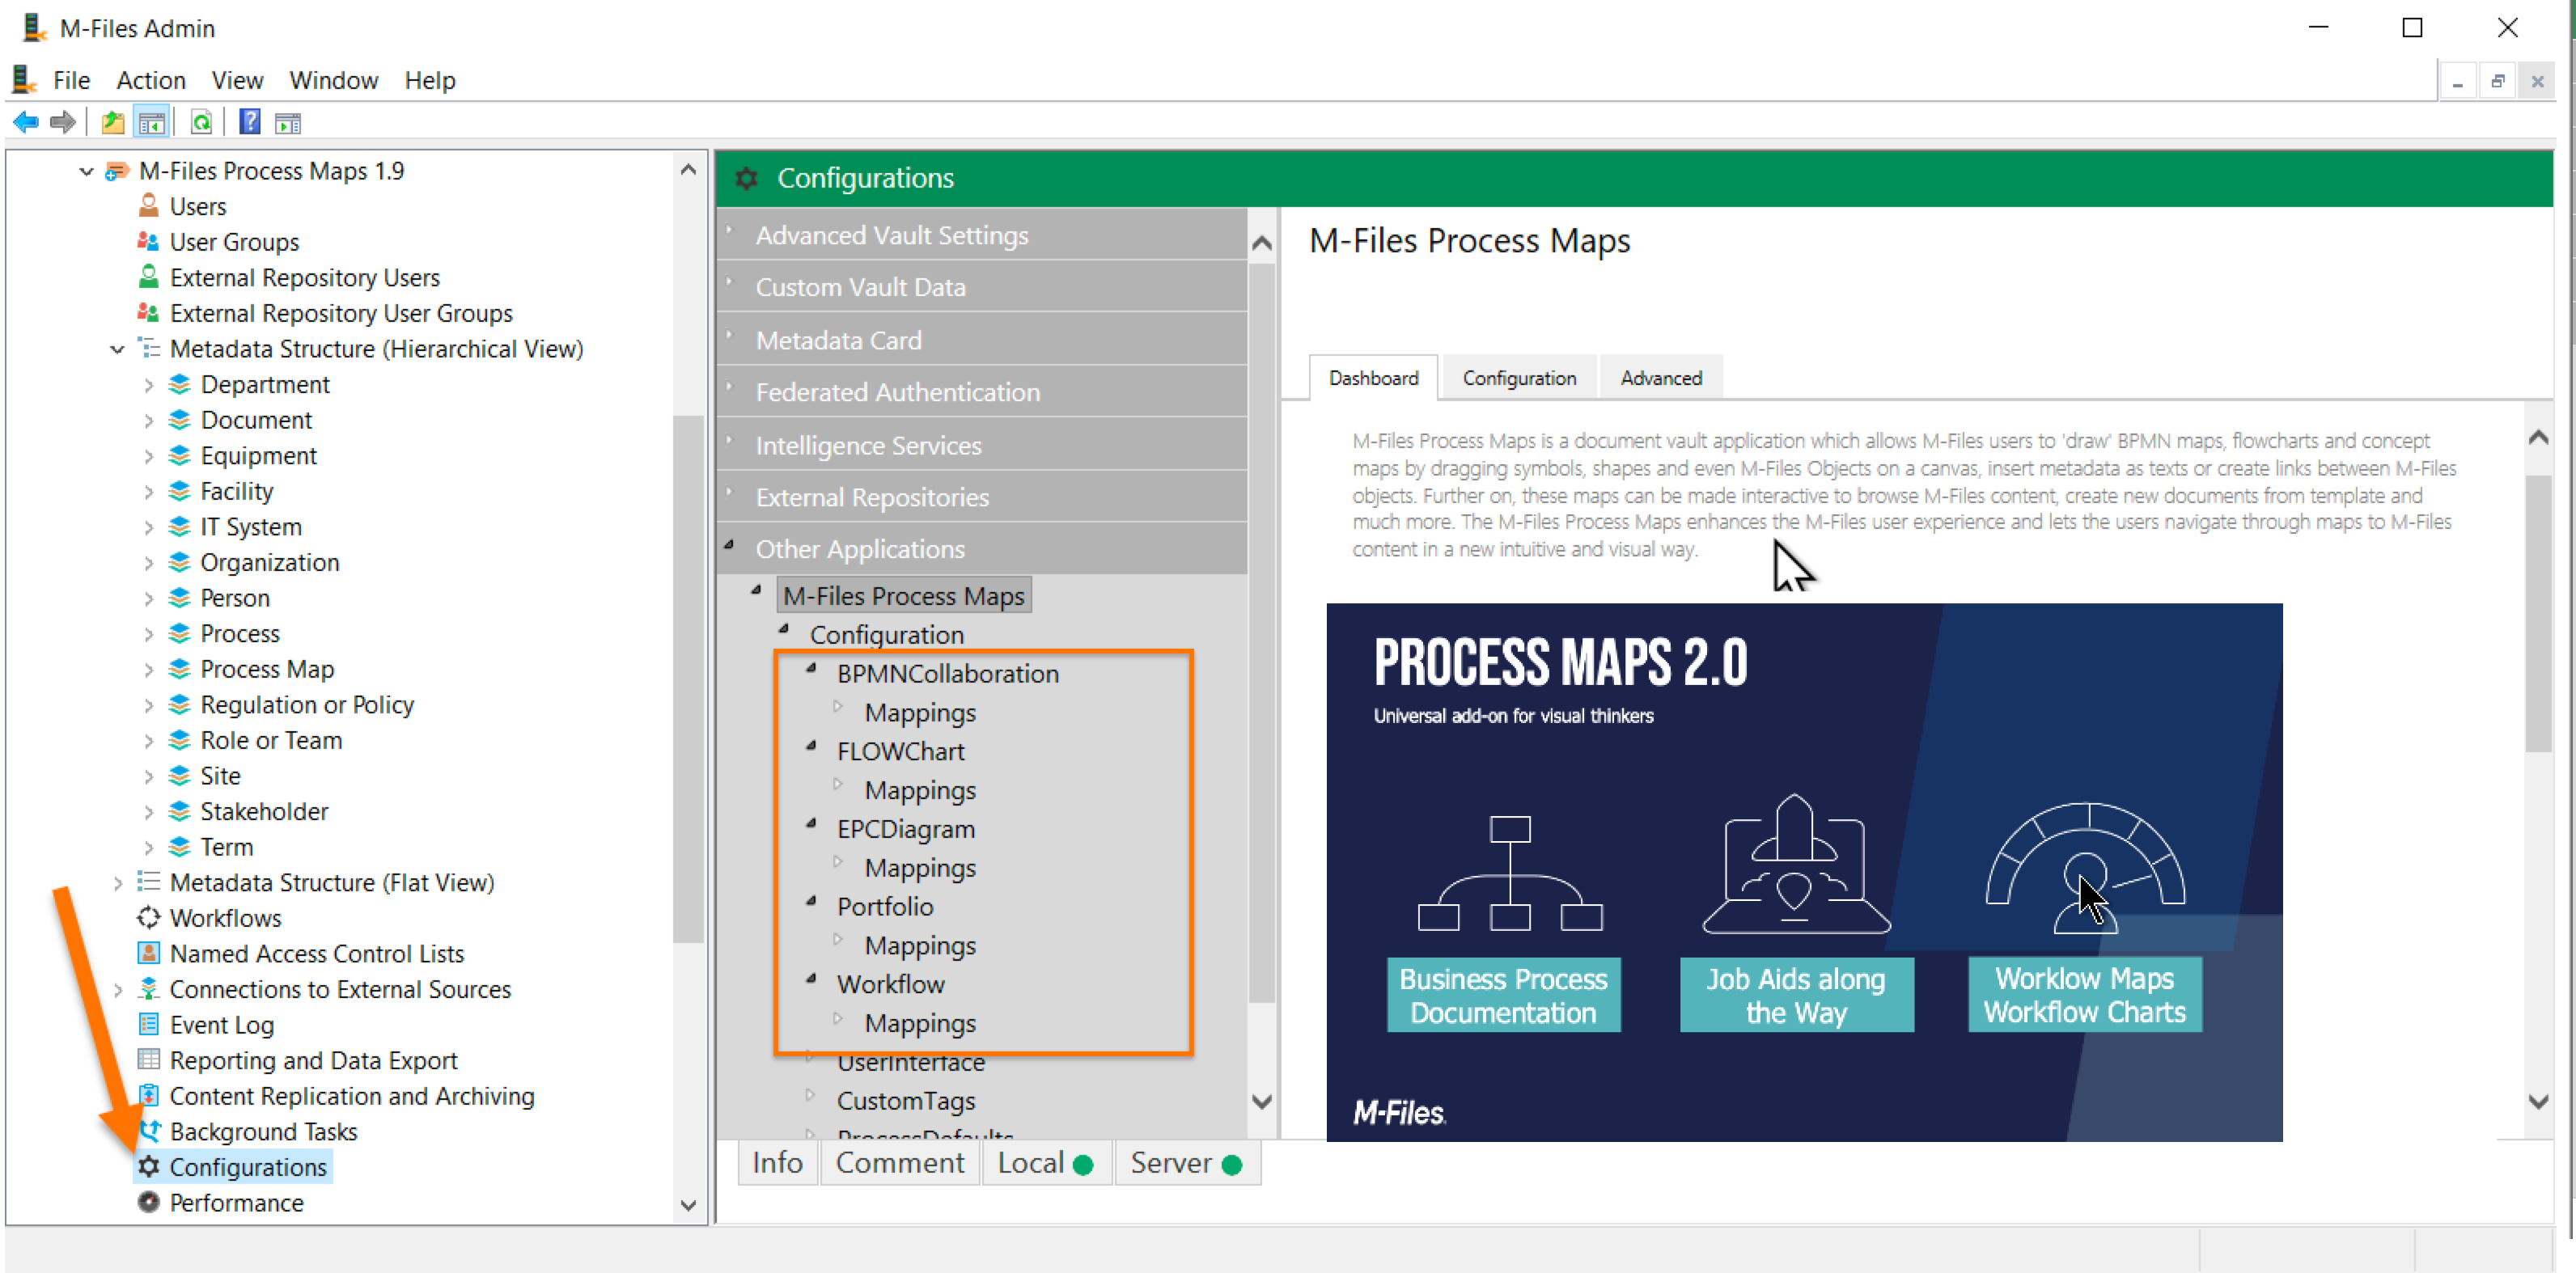
Open the M-Files Admin and go to the configurations panel in your vault:
- The M-Files Process Maps configuration is beneath the entry “Other Applications”.
- There are branches for each of the different Process Map classes:
- BPMNCollaboration
- FLOWChart
- EPCDiagram
- Portfolio
- Workflow
Symbols
Add any object type or class to the symbols of the respective notation that seem to make sense for your metadata structure.
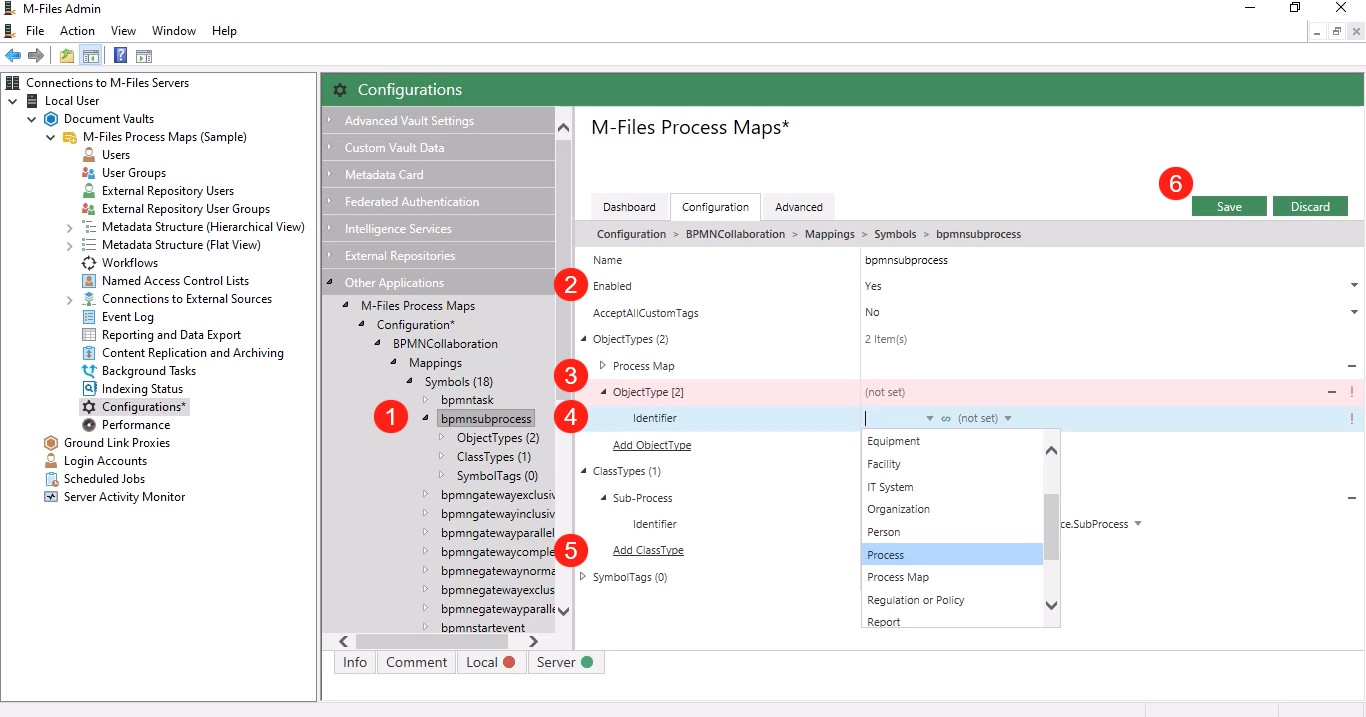
Select the desired notation and expand all nodes for an overview of the available symbols:
- Select the desired symbol.
- Specify whether the selected symbol should appear in the designer.
- On the right-hand side, you can assign new object types to the selected symbol. Click on Add ObjectType and a new entry will be displayed in red color until you have configured it correctly.
- Expand the new object type and select <Your ObjectType> as Identifier. The alias, GUID or ID are shown depending on your metadata model.
- Assign classes by opening the ClassTypes node and clicking on the Add ClassType entry. To assign the mapping, proceed in the same way as for a new object type.
- Click
 Save in the upper right-hand corner to apply your changes.
After saving your entries, open the M-Files Desktop and open an existing or new map in the Designer to load your changes. Of course, this should match the notation for which you have made the mapping. You can now test the mapping by dragging objects, of the object type you selected, from the left-hand bar onto the middle of the canvas. The object should now be displayed with the appropriate shape. Some elements have even more commands for navigation, information or URL-commands.
Edges
In some notations (especially the BPMN Collaboration Notation) there are special symbols for edges or transitions. In these notations, a symbol mapping can also be made for the edges.
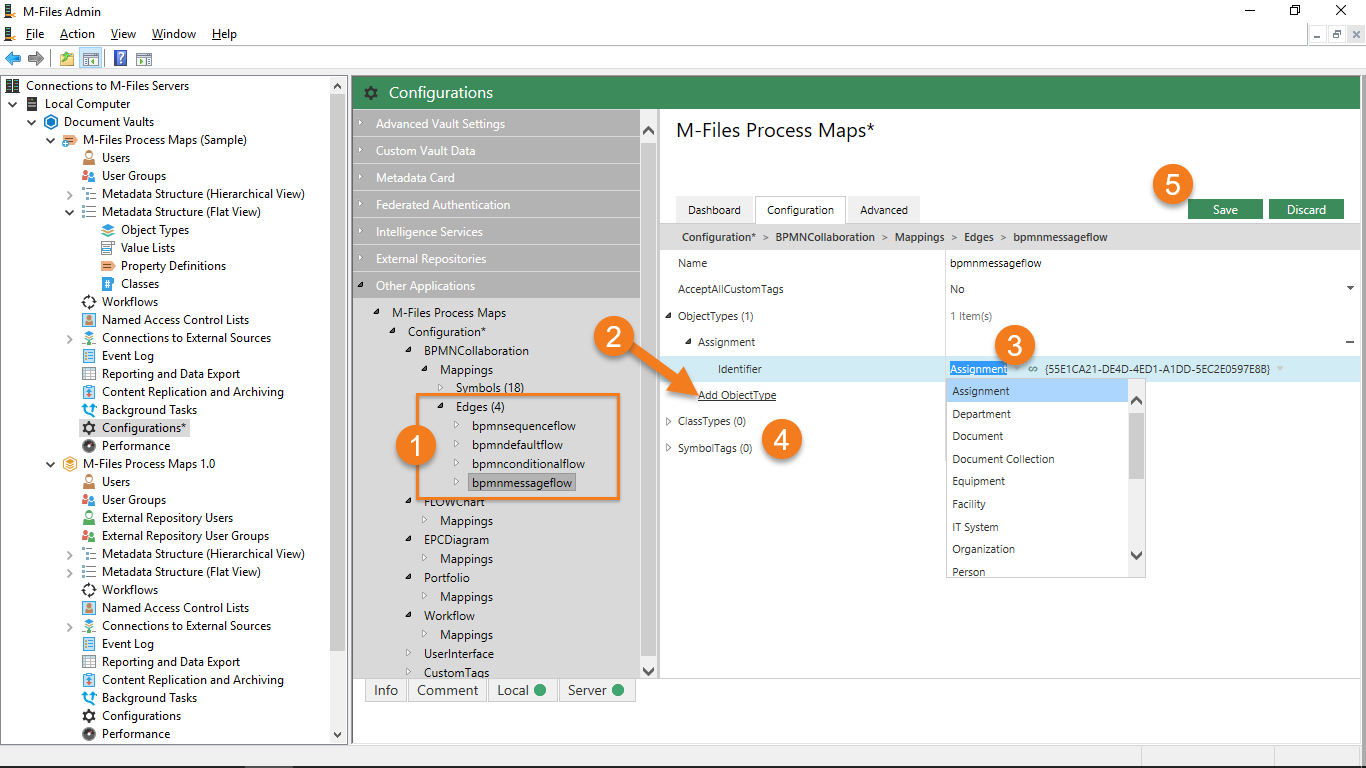
- Select the desired edge.
- On the right-hand side, you can assign new object types for the selected edge. Click on Add ObjectType and a new entry will be displayed in red color until you have configured it correctly.
- Expand the new object type and select <Your ObjectType> as Identifier. The alias, GUID or ID are shown depending on your metadata model.
- Assign classes by opening the ClassTypes node and clicking on the Add ClassType entry. To assign the mapping, proceed in the same way as for a new object type.
- Click Save in the upper right-hand corner to apply your changes.