meta data for this page
Map by Reference
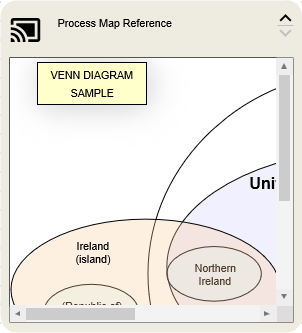
The Map by Reference Smart Node allows you to display the content of another map and interact with it. Although you could display the SVG image of a Process Map before, this was just a bare image and did not allow any interactions. This is now changing with the Map by Reference Smart Node. Special features are:
- Any command can be executed within the linked map.
- Show a part (viewport) of another map in your map.
- Changes to the linked map are displayed dynamically.
Where to find Map by Reference Smart Nodes
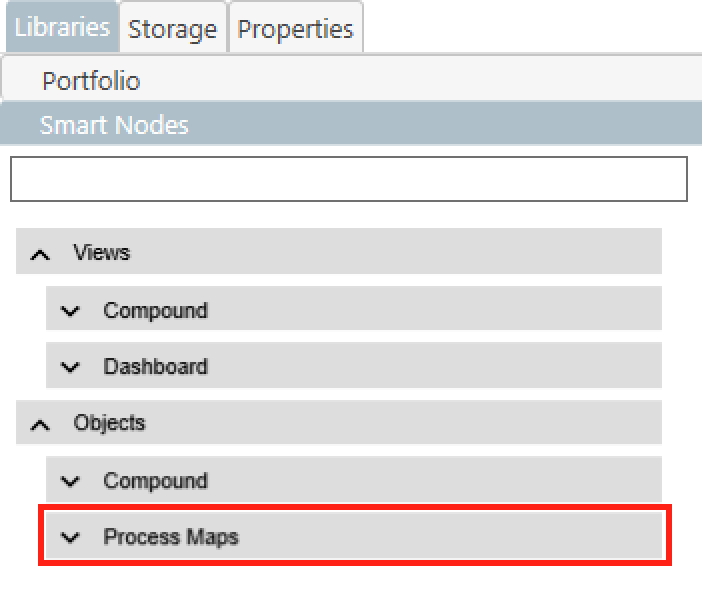
- Map by Reference Smart Nodes can be found in the Smart Node library in the
Process Mapstab of theObjectscategory. - When the tab is opened, you will find two types of Map by Reference Smart Nodes.
- If you want to learn more about the general use of the Smart Node Library, click here.
Variations & Functions
There are two different types of Map by Reference Smart Nodes. Map and Menu.
Map - It is advisable to use this Smart Node type if a section or a small Process Map is to be displayed. Further functions specialties are:
- Vertical orientation.
- Trigger any command within the map.
- Option to specifically display a viewport of the linked map and jump between others.
- Navigating through the map using scrollbars (can be deactivated).
Menu - This type is designed to represent menu structures in particular. In addition, other functions and special features are:
- Horizontal alignment.
- Automatically adjusts to the entire size of the linked map.
- Option to specifically display a viewport of the linked map and jump between others.
- Scrollbars are disabled by default.
Properties
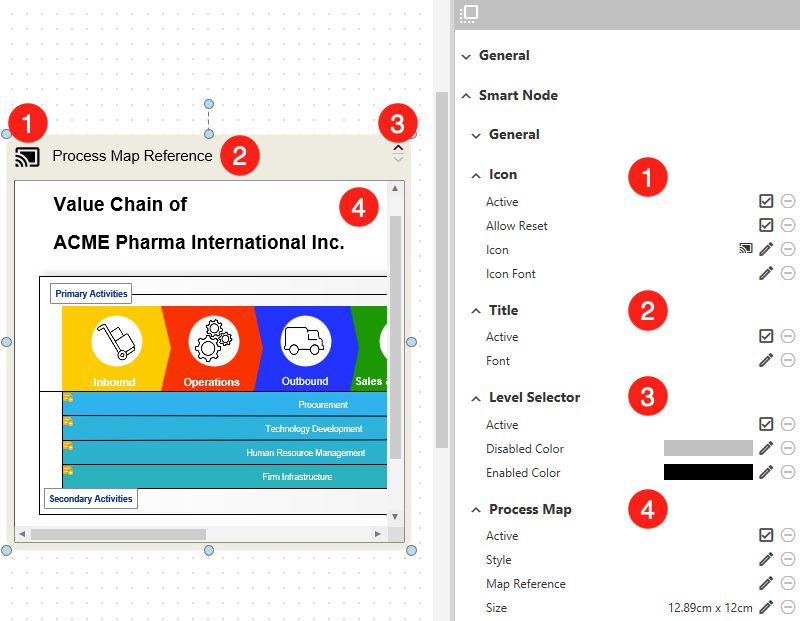
1. Icon
- Active - If the display of an icon is undesirable, this can be deactivated here.
- Allow Reset - Here you can switch on or off whether the displayed Process Map inside the Smart Node should jump back to its original state when the icon is clicked.
- Icon - A click opens a list of possible icons that can be freely selected according to your needs.
- Icon Font - If you want to change the size or color of the icon, this menu item can help you. Similar to labels, you can personalize the appearance of the icon here.
2. Title - This item lets you adjust the title (Process Map Reference) that is displayed in the upper area of the Smart Node.
- Active - De-/Activate the functionality
- Font - As with any other label, it is also possible to customize the way the Smart Node label is displayed. If you need more information on how to customize the font of texts, you can find more information here.
3. Level Selector - Here you can customize the appearance of the buttons to expand ∧ or shrink ∨ the Smart Node.
- Active - De-/Activate the functionality
- Disabled Color - A button is deactivated when the Smart Node can not be expanded/shrank in its direction. The color it should assume in this state can be set here.
- Enabled Color - Conversely, if a Smart Node can be expanded/shrank in the direction of the button, it also takes on a specific color. This color can be determined here.
4. Process Map - In general, the core functionality of the Smart Node, the display of another Process Map, can be influenced in this section.
- Active - De-/Activate the functionality
- Style - Both cosmetic and functional changes can be made to the displayed Process Map.
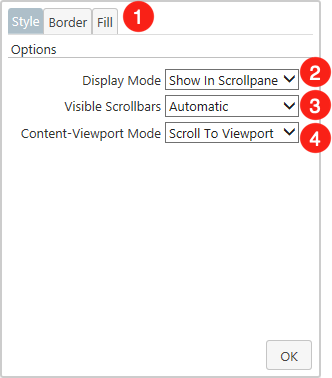
- At the top of the dialog you will find the tab
Styleas well asBorderandFill. In the Border tab you have the possibility to define the border of the linked process map by using a color palette. Fill, on the other hand, can be used to change the background color of the linked process map. - Display Mode - Here you have the choice between
Size To ContentandShow In Scrollpane. If Size To Content is selected, the entire Process Map is displayed in the Smart Node. Since this can quickly lead to performance issues, this display format is only recommended for relatively small maps. Show In Scrollpane displays a small part of the Process Map, which can be moved with the help of scrollbars. - Visible Scrollbars - Please note that this option is only available if you have previously selected Show In Scrollpane. The scrollbars within the Smart Node can be set to either
Automatic,VisibleorHidden. Automatic means that scrollbars are only displayed if the entire content of a map is not displayed in the Smart Node. If the Smart Node is resized so that the whole map can be shown, the scrollbars disappear. If, on the other hand, Visible or Hidden is selected, the scrollbars are always or never shown, respectively. - Content-Viewport Mode - Please note that this option is only available if you have previously selected
Show In Scrollpane. Specify whether the selected viewport of a Smart Node is displayed completely (Size to Viewport), or only a scrollable section of it (Scroll To Viewport).
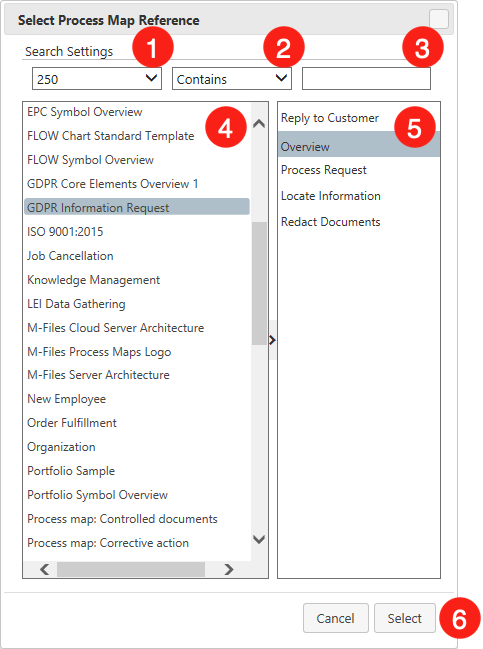
- Map Reference - In addition to the Quick Choice menu and the drag and drop functionality, a Process Map can also be linked to the Smart Node using its properties. a big advantage of this method is that a viewport of the Process Map can also be selected.
- Result Limits - A list from which the user can determine the maximum number of results.
- Search Settings - Set whether the name search should refer to all parts of the object names (Contains), the beginning (Starts With), or the same pattern (Matches Pattern).
- Search Bar - Enter your search term here.
- Process Map Selection - In this section, you can select the Process Map to be displayed by the Smart Node. Please note that by default a maximum of 250 process maps of your vault will be displayed. To limit or extend this listing you have to use the
Search Settings. - Viewport Selection - If your selected Process Map contains one or more viewports, they will be listed here. This allows you to determine which part of the map should be displayed by default in the Smart Node.
- Select - Save your changes.

