

meta data for this page
Create a Map for a Workflow Step
To show a map, when an object or document is in a specific state (and only then), can be a powerful tool for workplace support. While Workflow Maps are shown always and for any state, the Work step maps can be more specific. Or you could use them to handle exceptions and provide guidance in special cases.
Contrary to Workflow Maps, maps shown here, do not automatically highlight specific zones or interpret the workflow states directly. The idea is, that these maps provide guidance along the way. Work Step tabs can be linked directly to one or more workflow states. Work step tabs are only displayed if the selected object is on the desired workflow and in one of the selected states.
These maps can e.g. contain detailed information on the execution of a task or status change.
The Work Step Map could e.g. answer the leading questions:
- What is expected of the user in this work step?
- What pre- and post-conditions are required for a status change?
- Are there any automatic processes that run in the background?
Setting up a Map for a Workflow Step
Basically, Maps for Workflow steps are created via the Save and Configure dialog. You can find this dialog in the Designer toolbar. Once the Save and Configure dialog is opened, you need to switch to the Show With Workflow tab.
Since it is usually desired that only more experienced users have the ability to create maps for workflow steps, this tab is by default only enabled for Vault Administrators. If other user groups should have access to this tab, this can be defined in the M-Files Admin configuration.
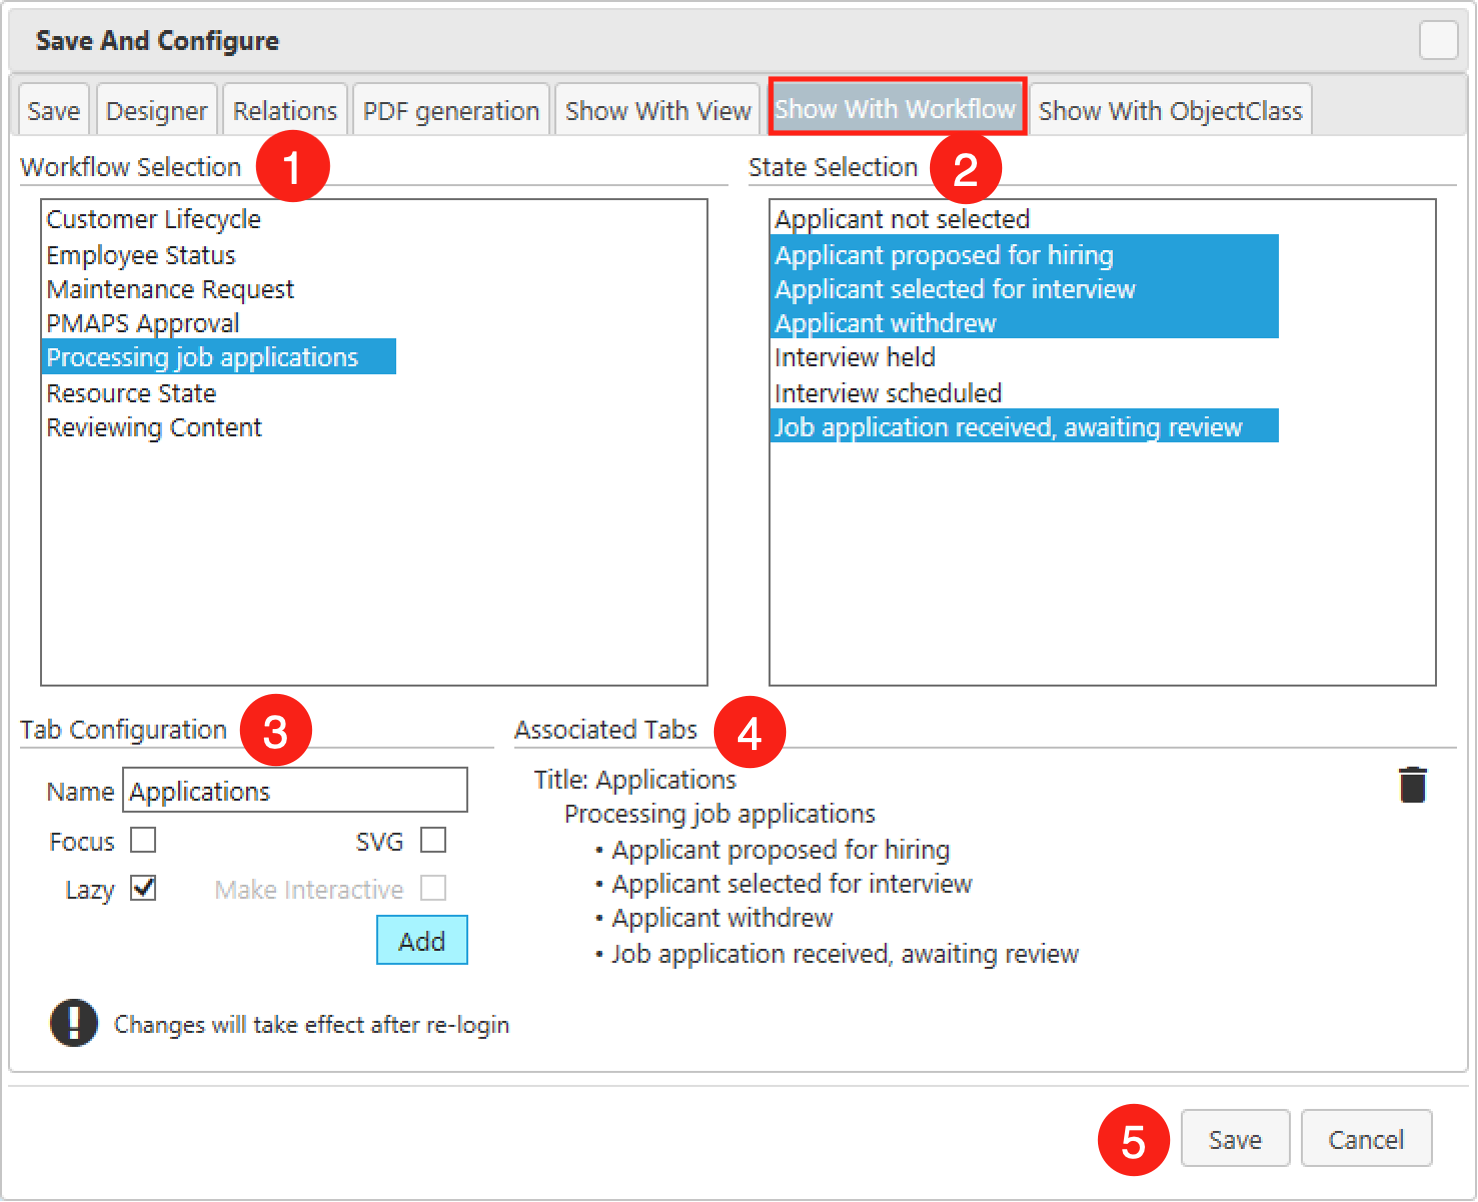
- Workflow Selection - This list shows all available Workflows in your vault. Select your Workflow here. You will see the corresponding workflow states on the right.
- State Selection - Here you find the specific workflow states of the workflow. You can select multiple states.
- Tab Configuration - In this section you define the display and loading options. They address the behavior, define its triggers, and have an impact on the performance and usability of your system.
- Associated tabs - One process map can be associated with multiple tab definitions for different purposes. You see the current configurations listed here. You can use the trash bin to delete an entry. You can select an entry and see the settings. The button below the configuration allows you to change a setting.
- Save or Cancel - When you click
Save, the configurations are written to the server. They do not become active right away. Changes will take effect after re-login.
TIP: We suggest to use Lazy loading and SVG display as the standard for simple guides or cheat sheets. If they are interactive, then use the option Make Interactive to keep your system in high performance.